NEW MATEK MATEKSYS MR24-30-TX MLRS MAVLINK 2.4GHZ TX MODULE KIT 2.4G LoRa 30 dBm RF power For Long Range Rc Model
Description
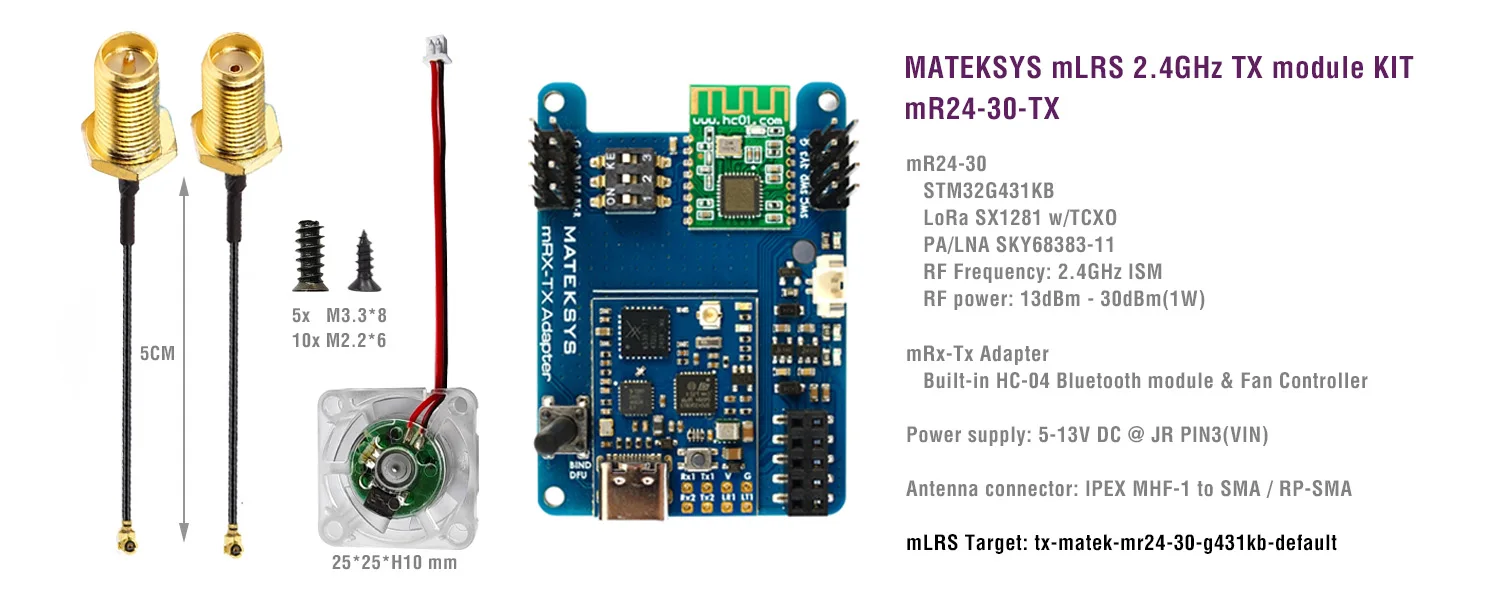
Specifications
-
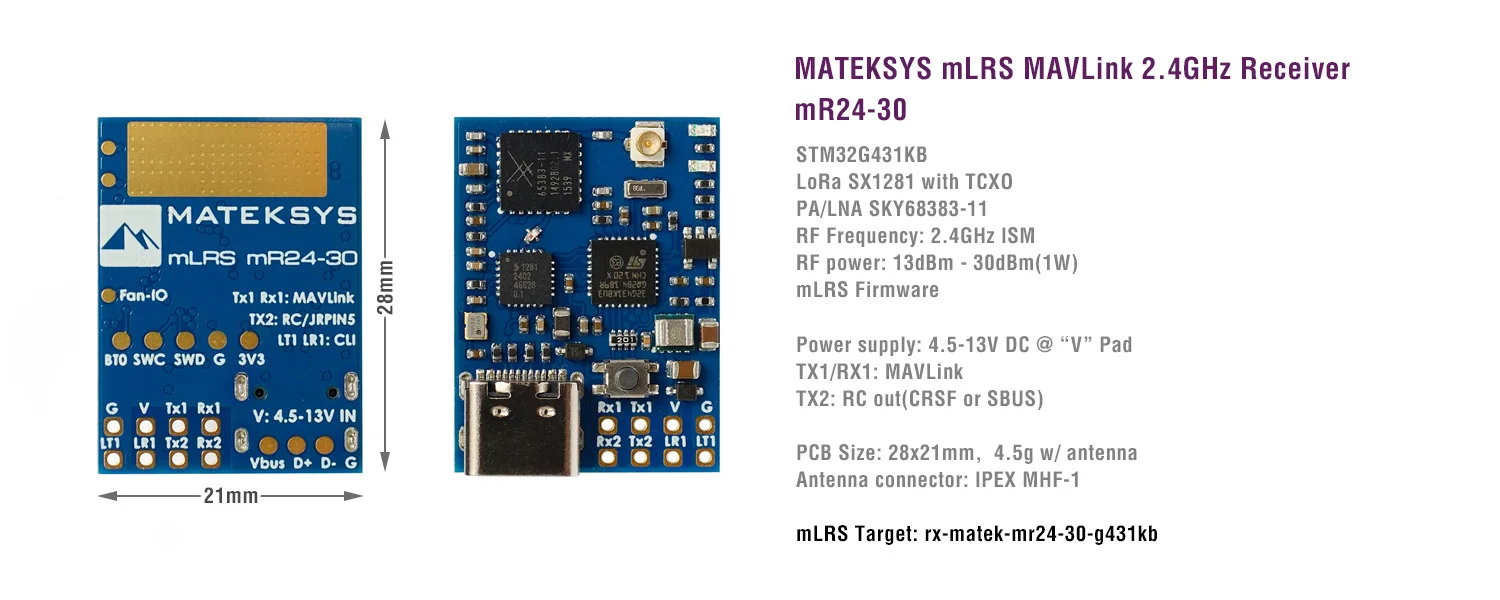
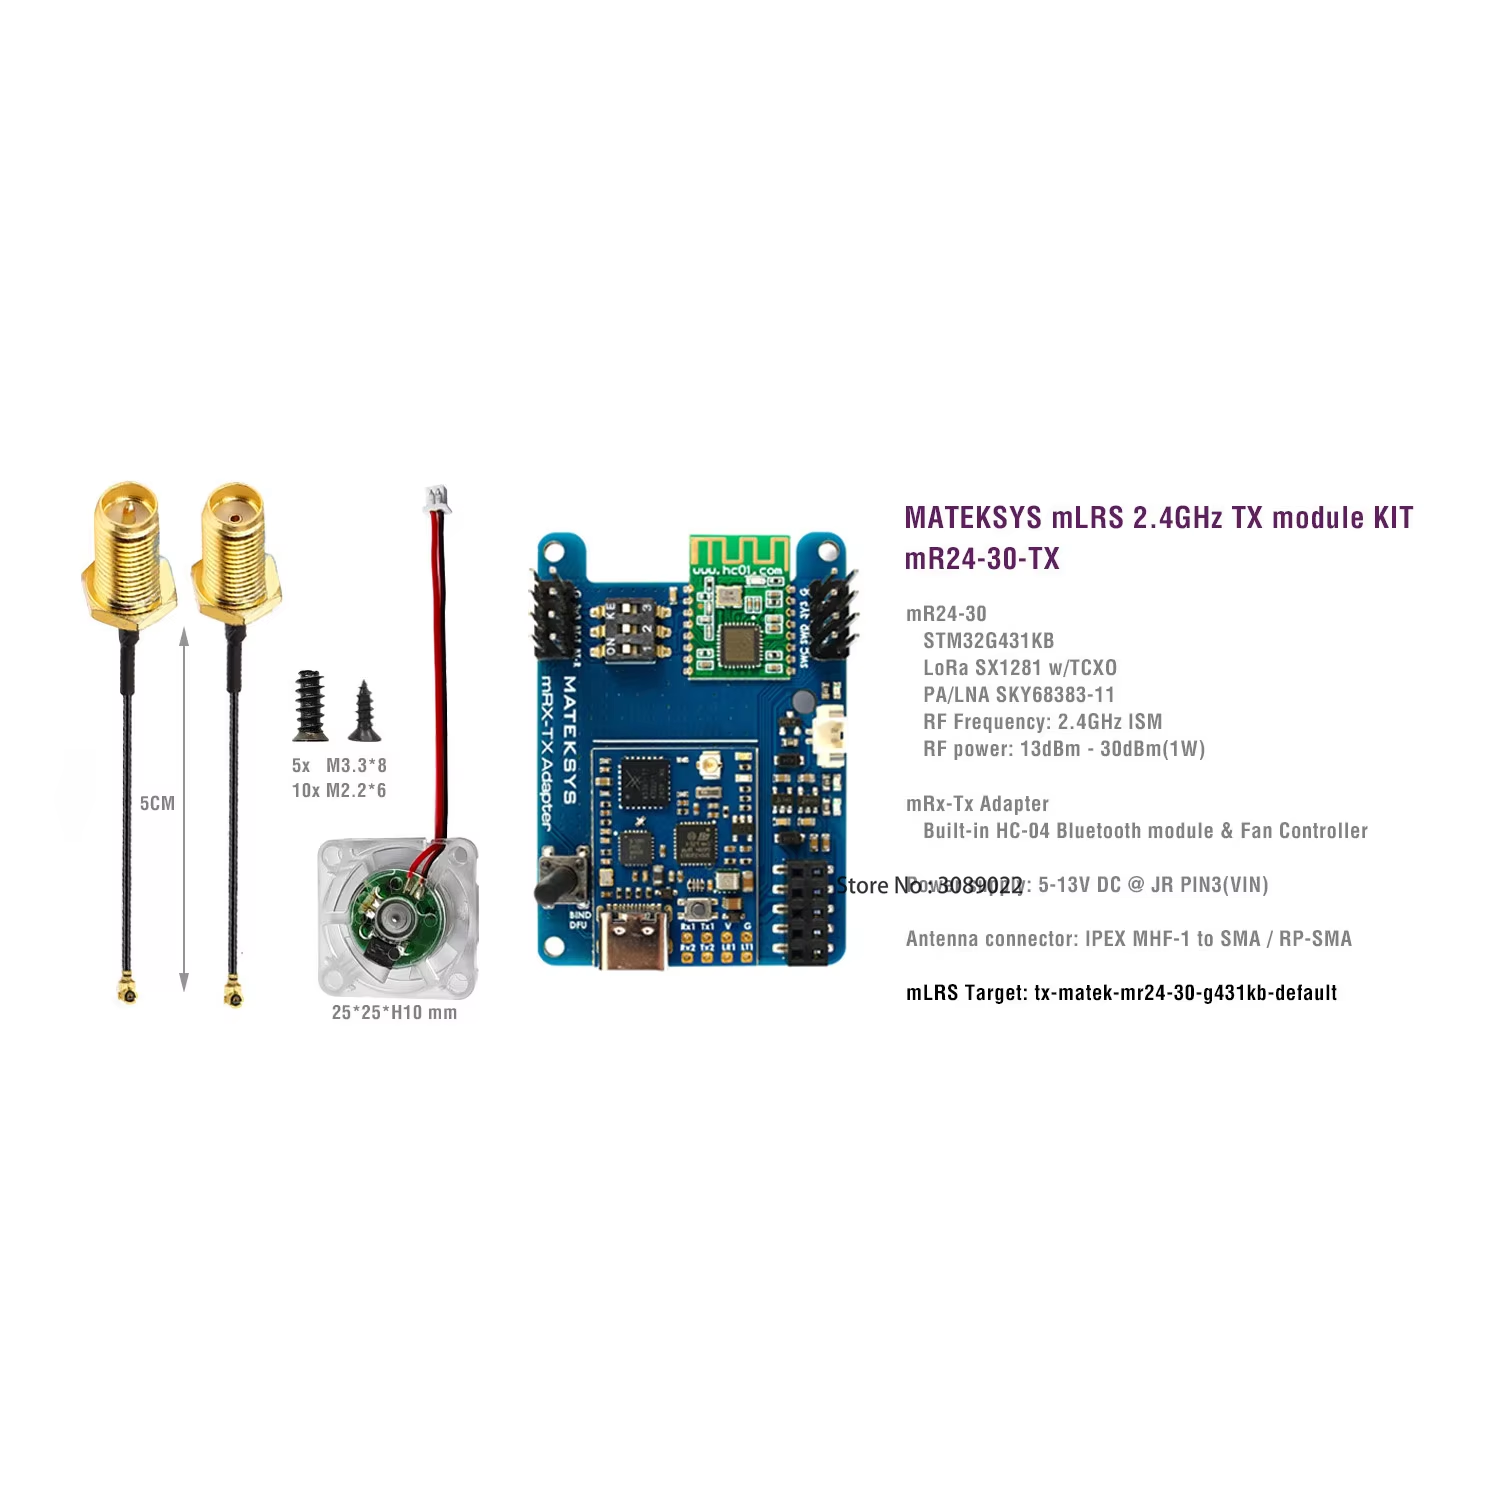
mR24-30
- STM32G431KB, mLRS firmware
- LoRa SX1281 with TCXO
- PA/LNA SKY68383-11
- RF Frequency: 2.4GHz ISM
- RF power: 13dBm(min) / 20dBm / 24dBm / 27dBm / 30dBm(1000mW)
- Antenna connector: IPEX MHF-1 to SMA/RP-SMA
-
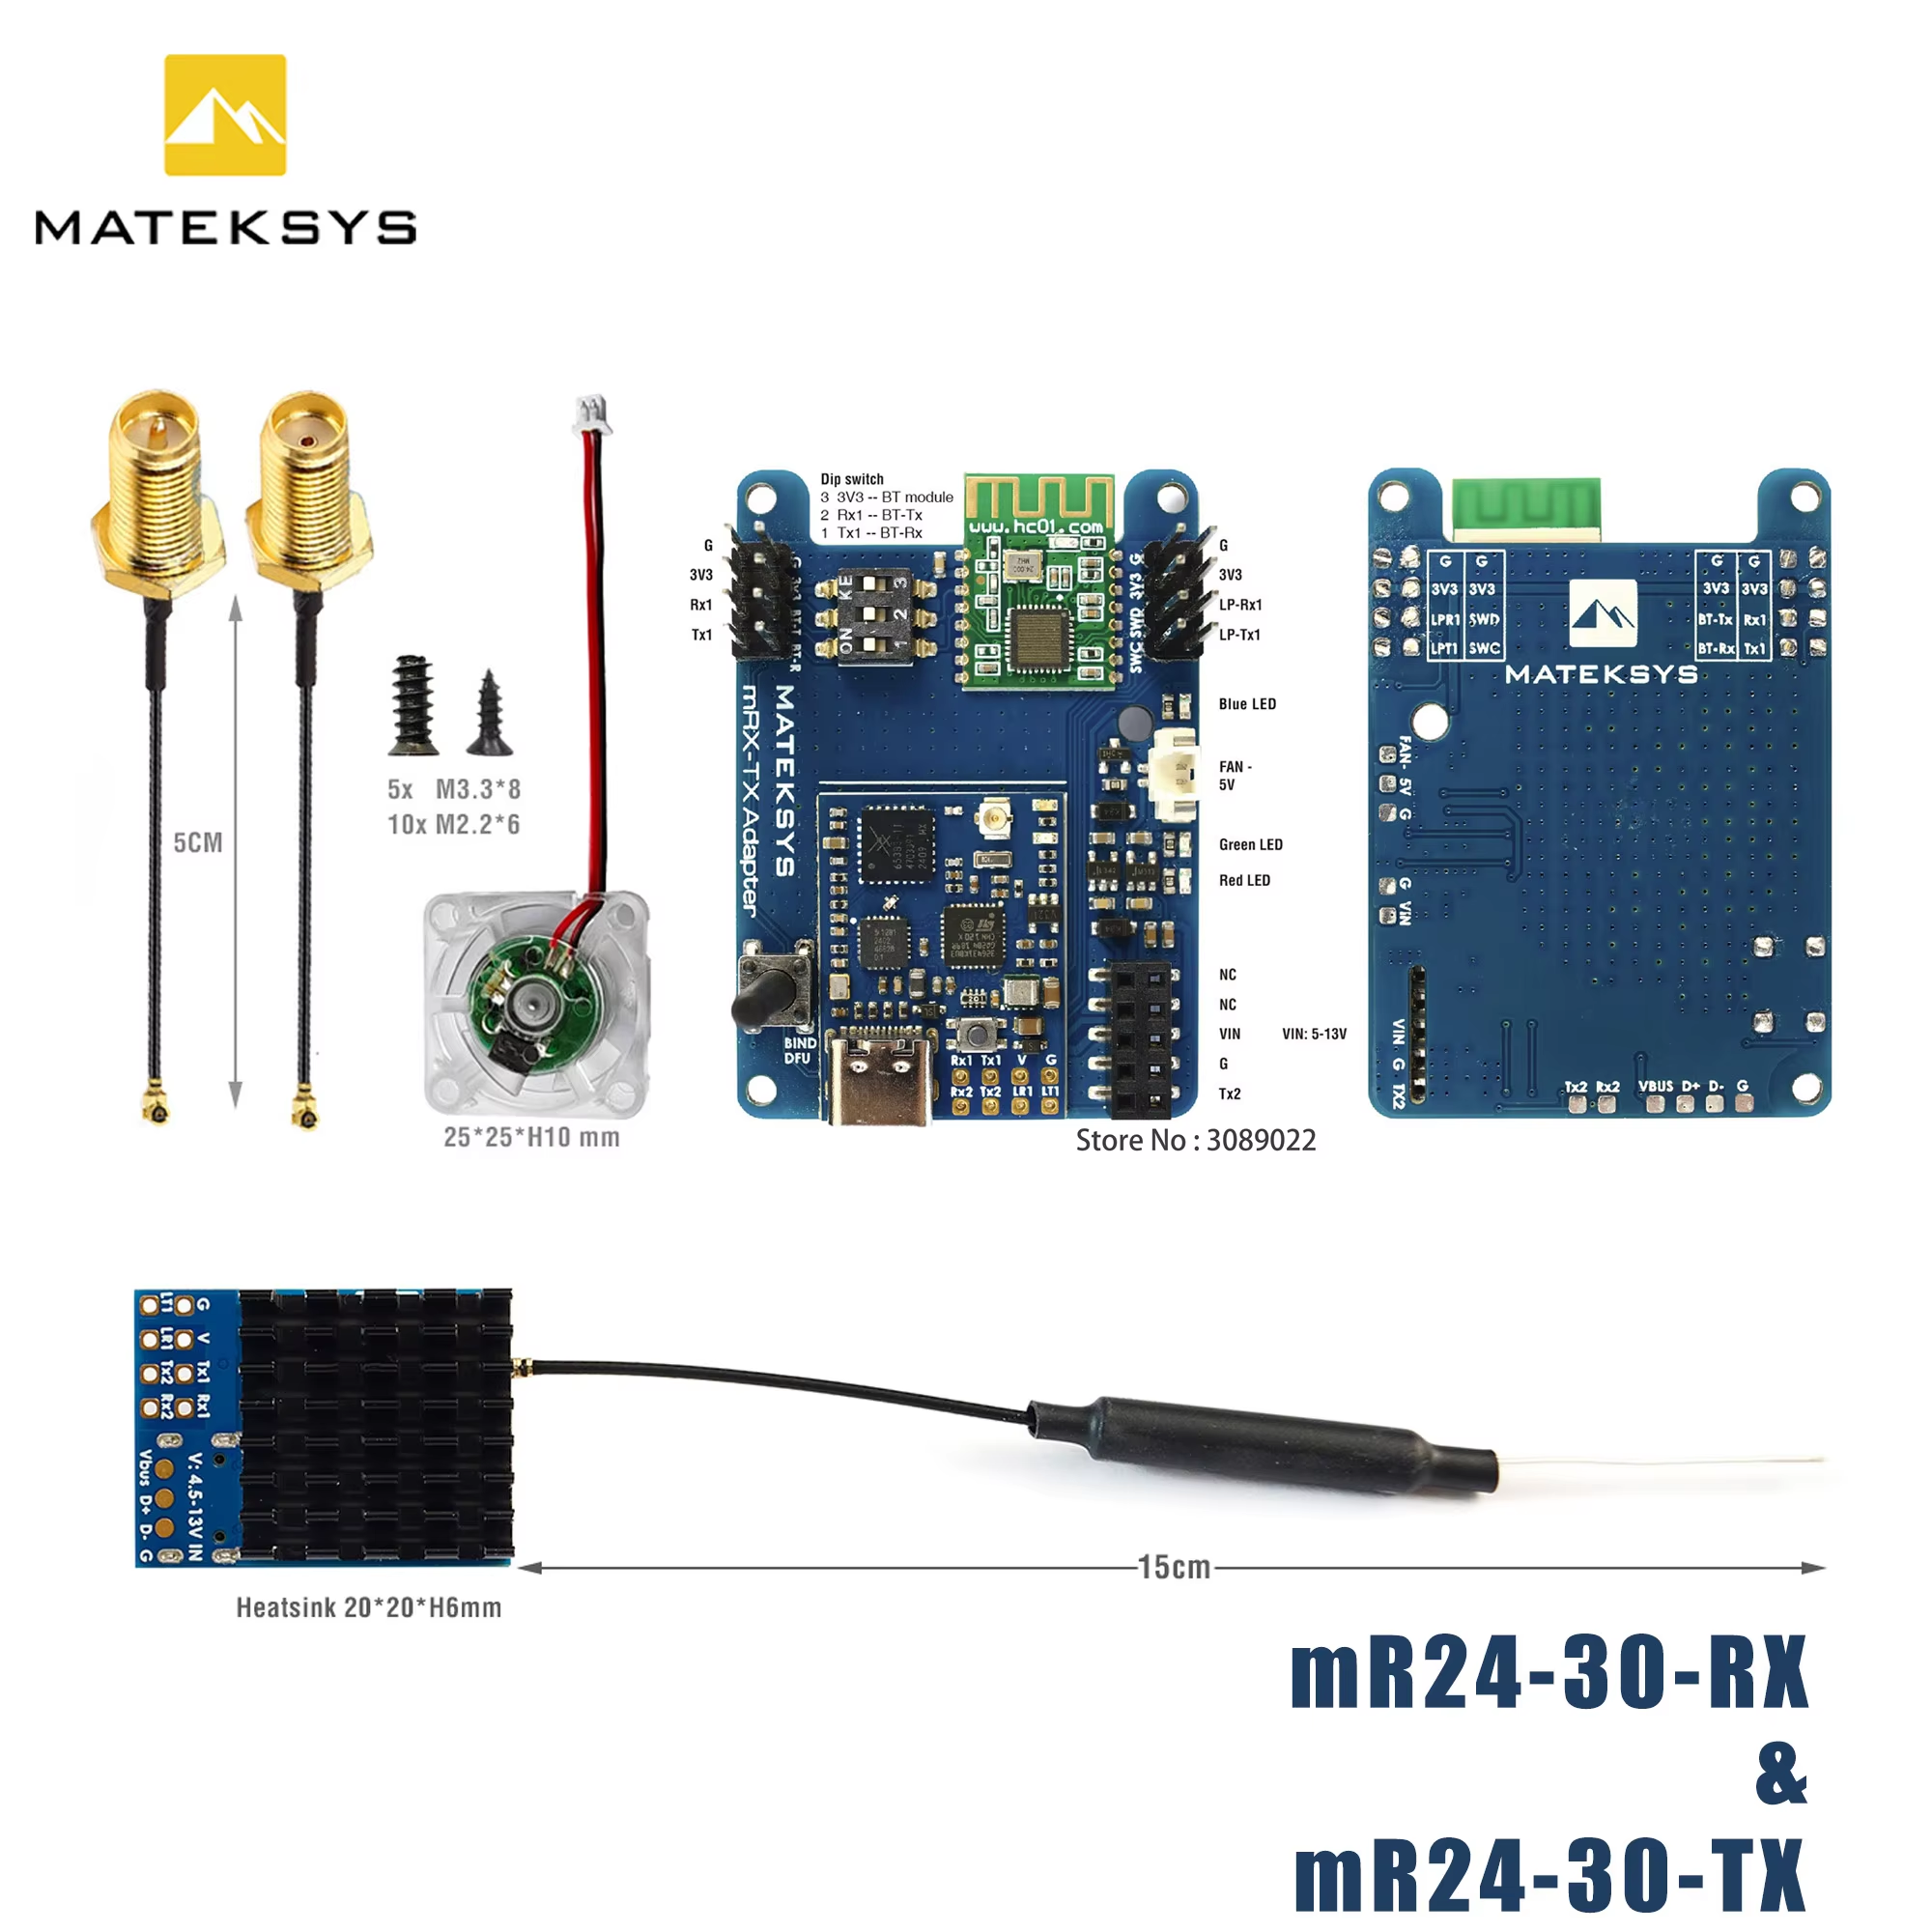
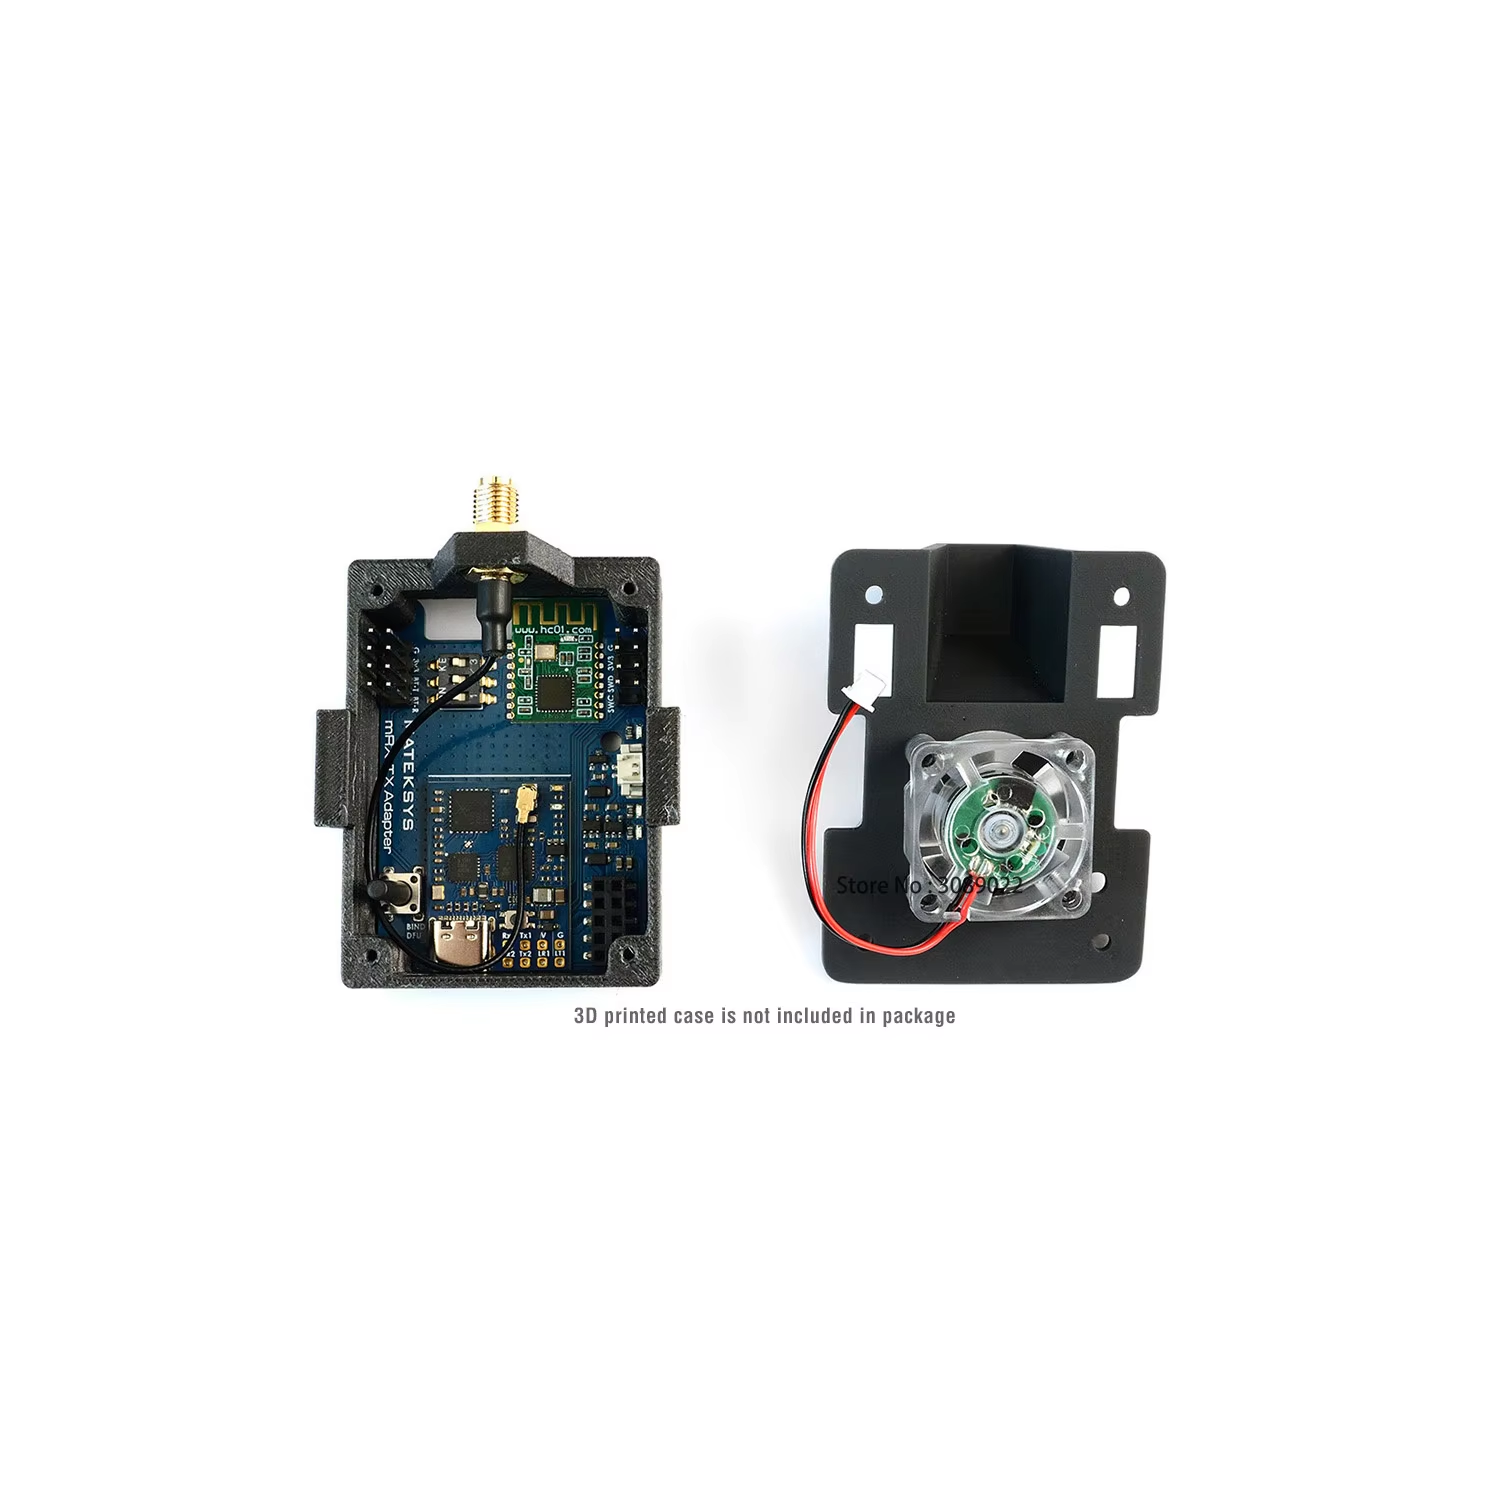
mRx-Tx Adapter
- Built-in HC-04 Bluetooth module
- Built-in 5V fan controller, running if ourput power>=500mW
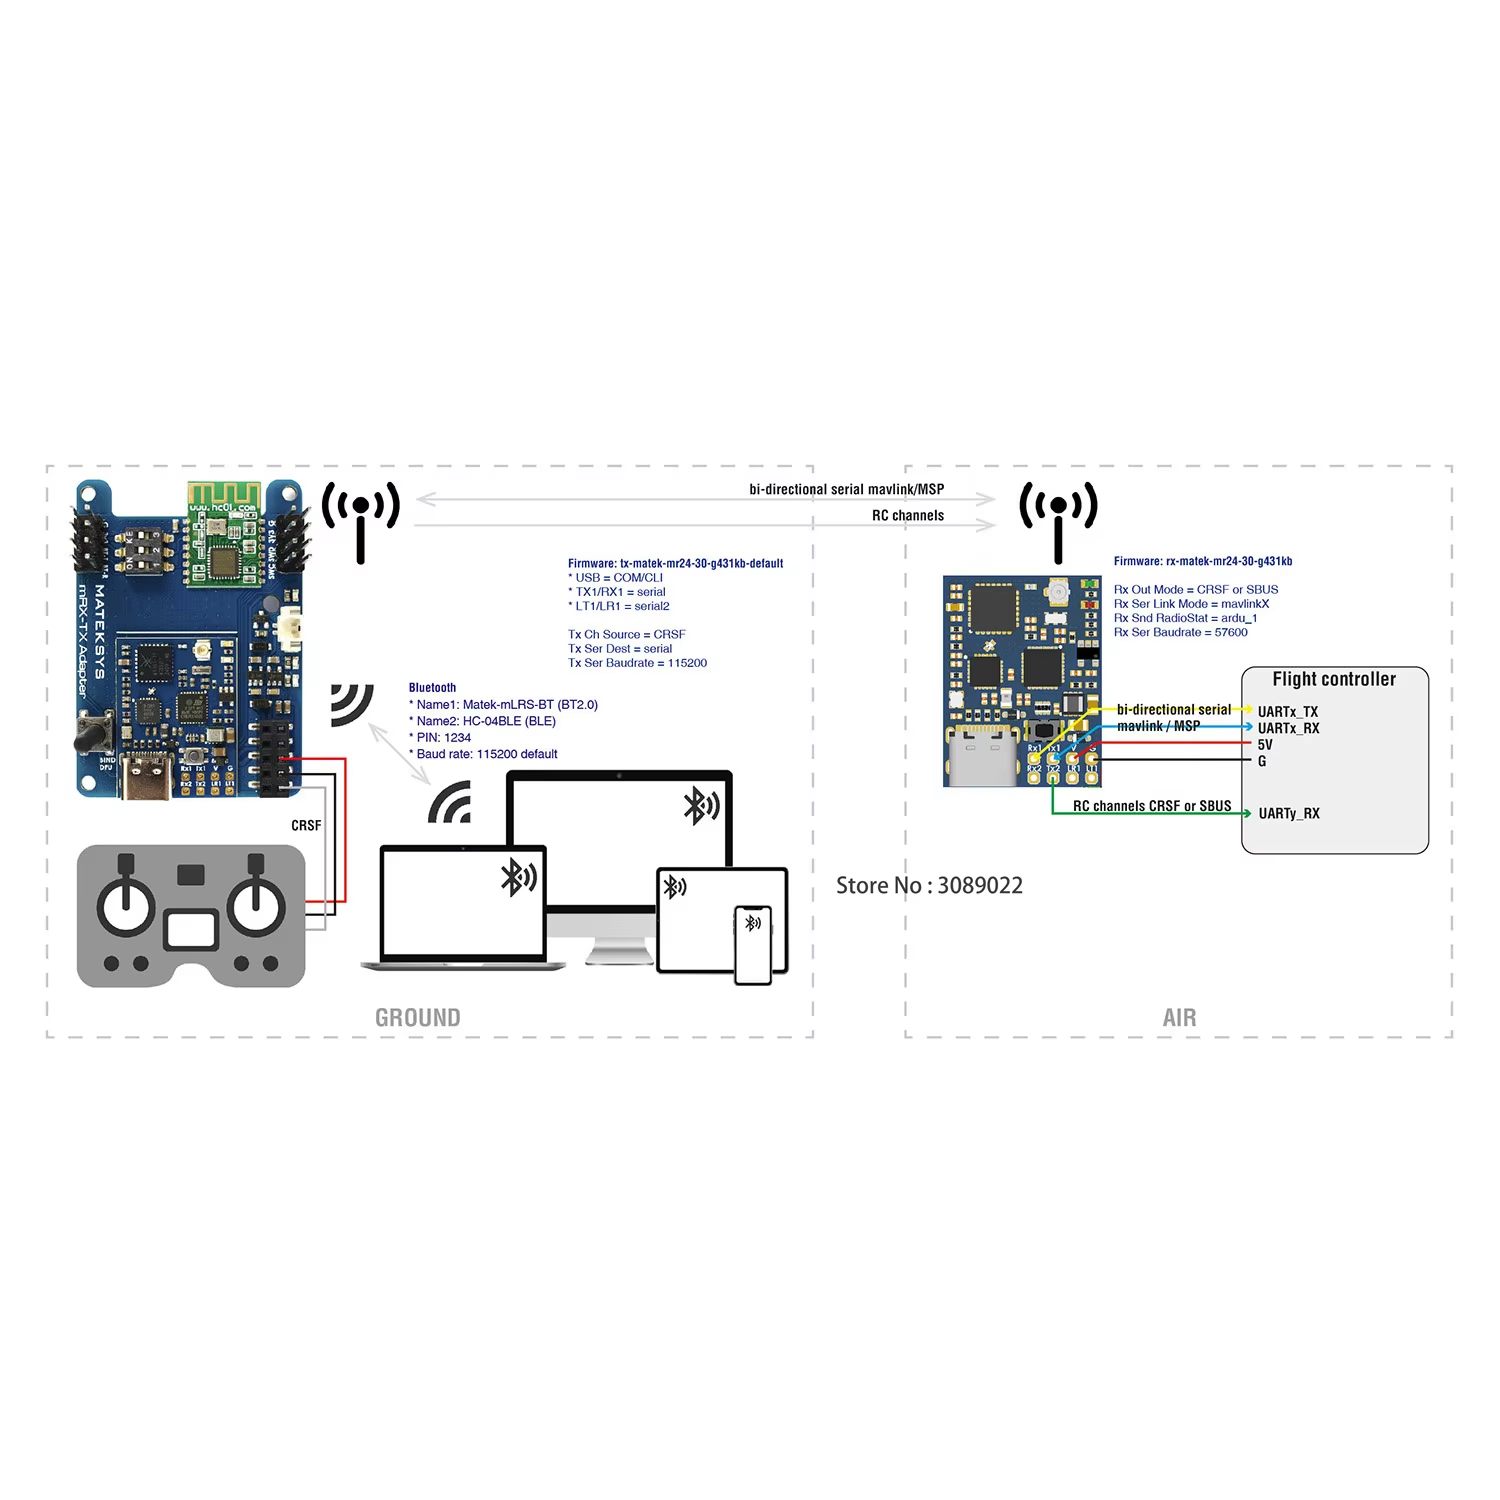
- TX2: RC IN(CRSF)
- one buttom for DFU mode and Bind
- Red and Green LED for mLRS status
- Blue LED for bluetooth status
- Power supply: 5-13V DC @ JR_PIN3 (VIN)
-
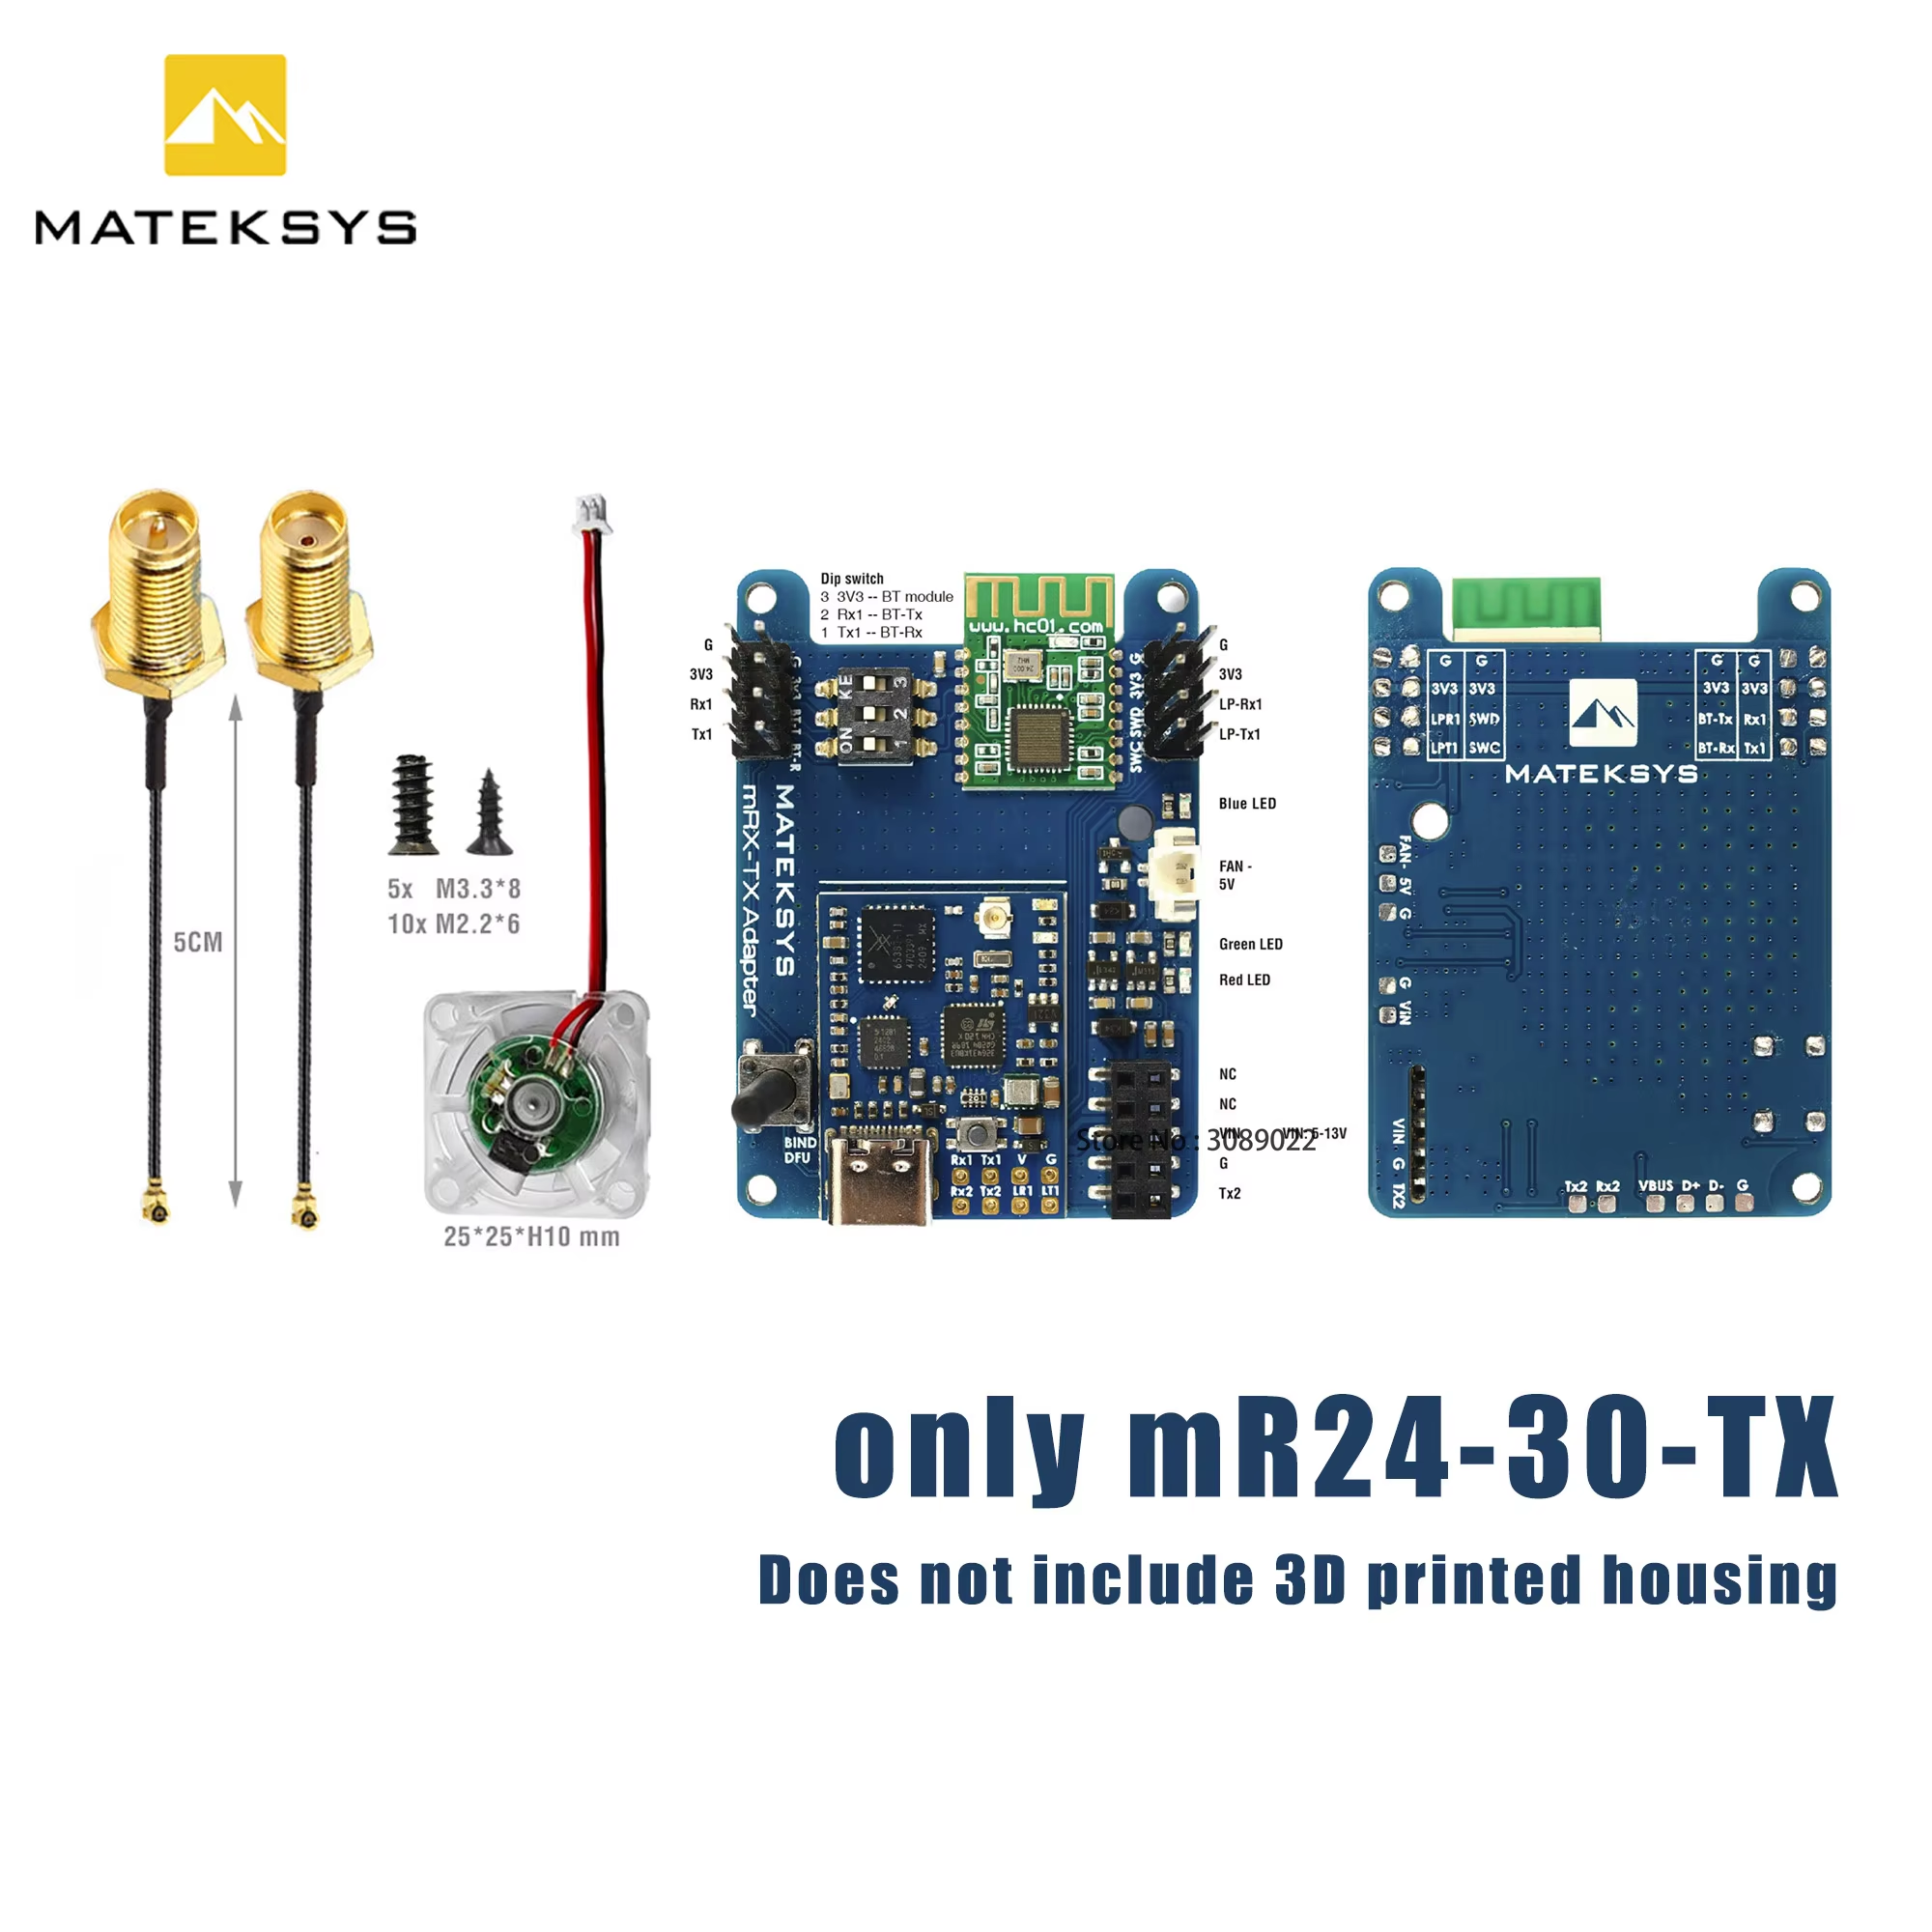
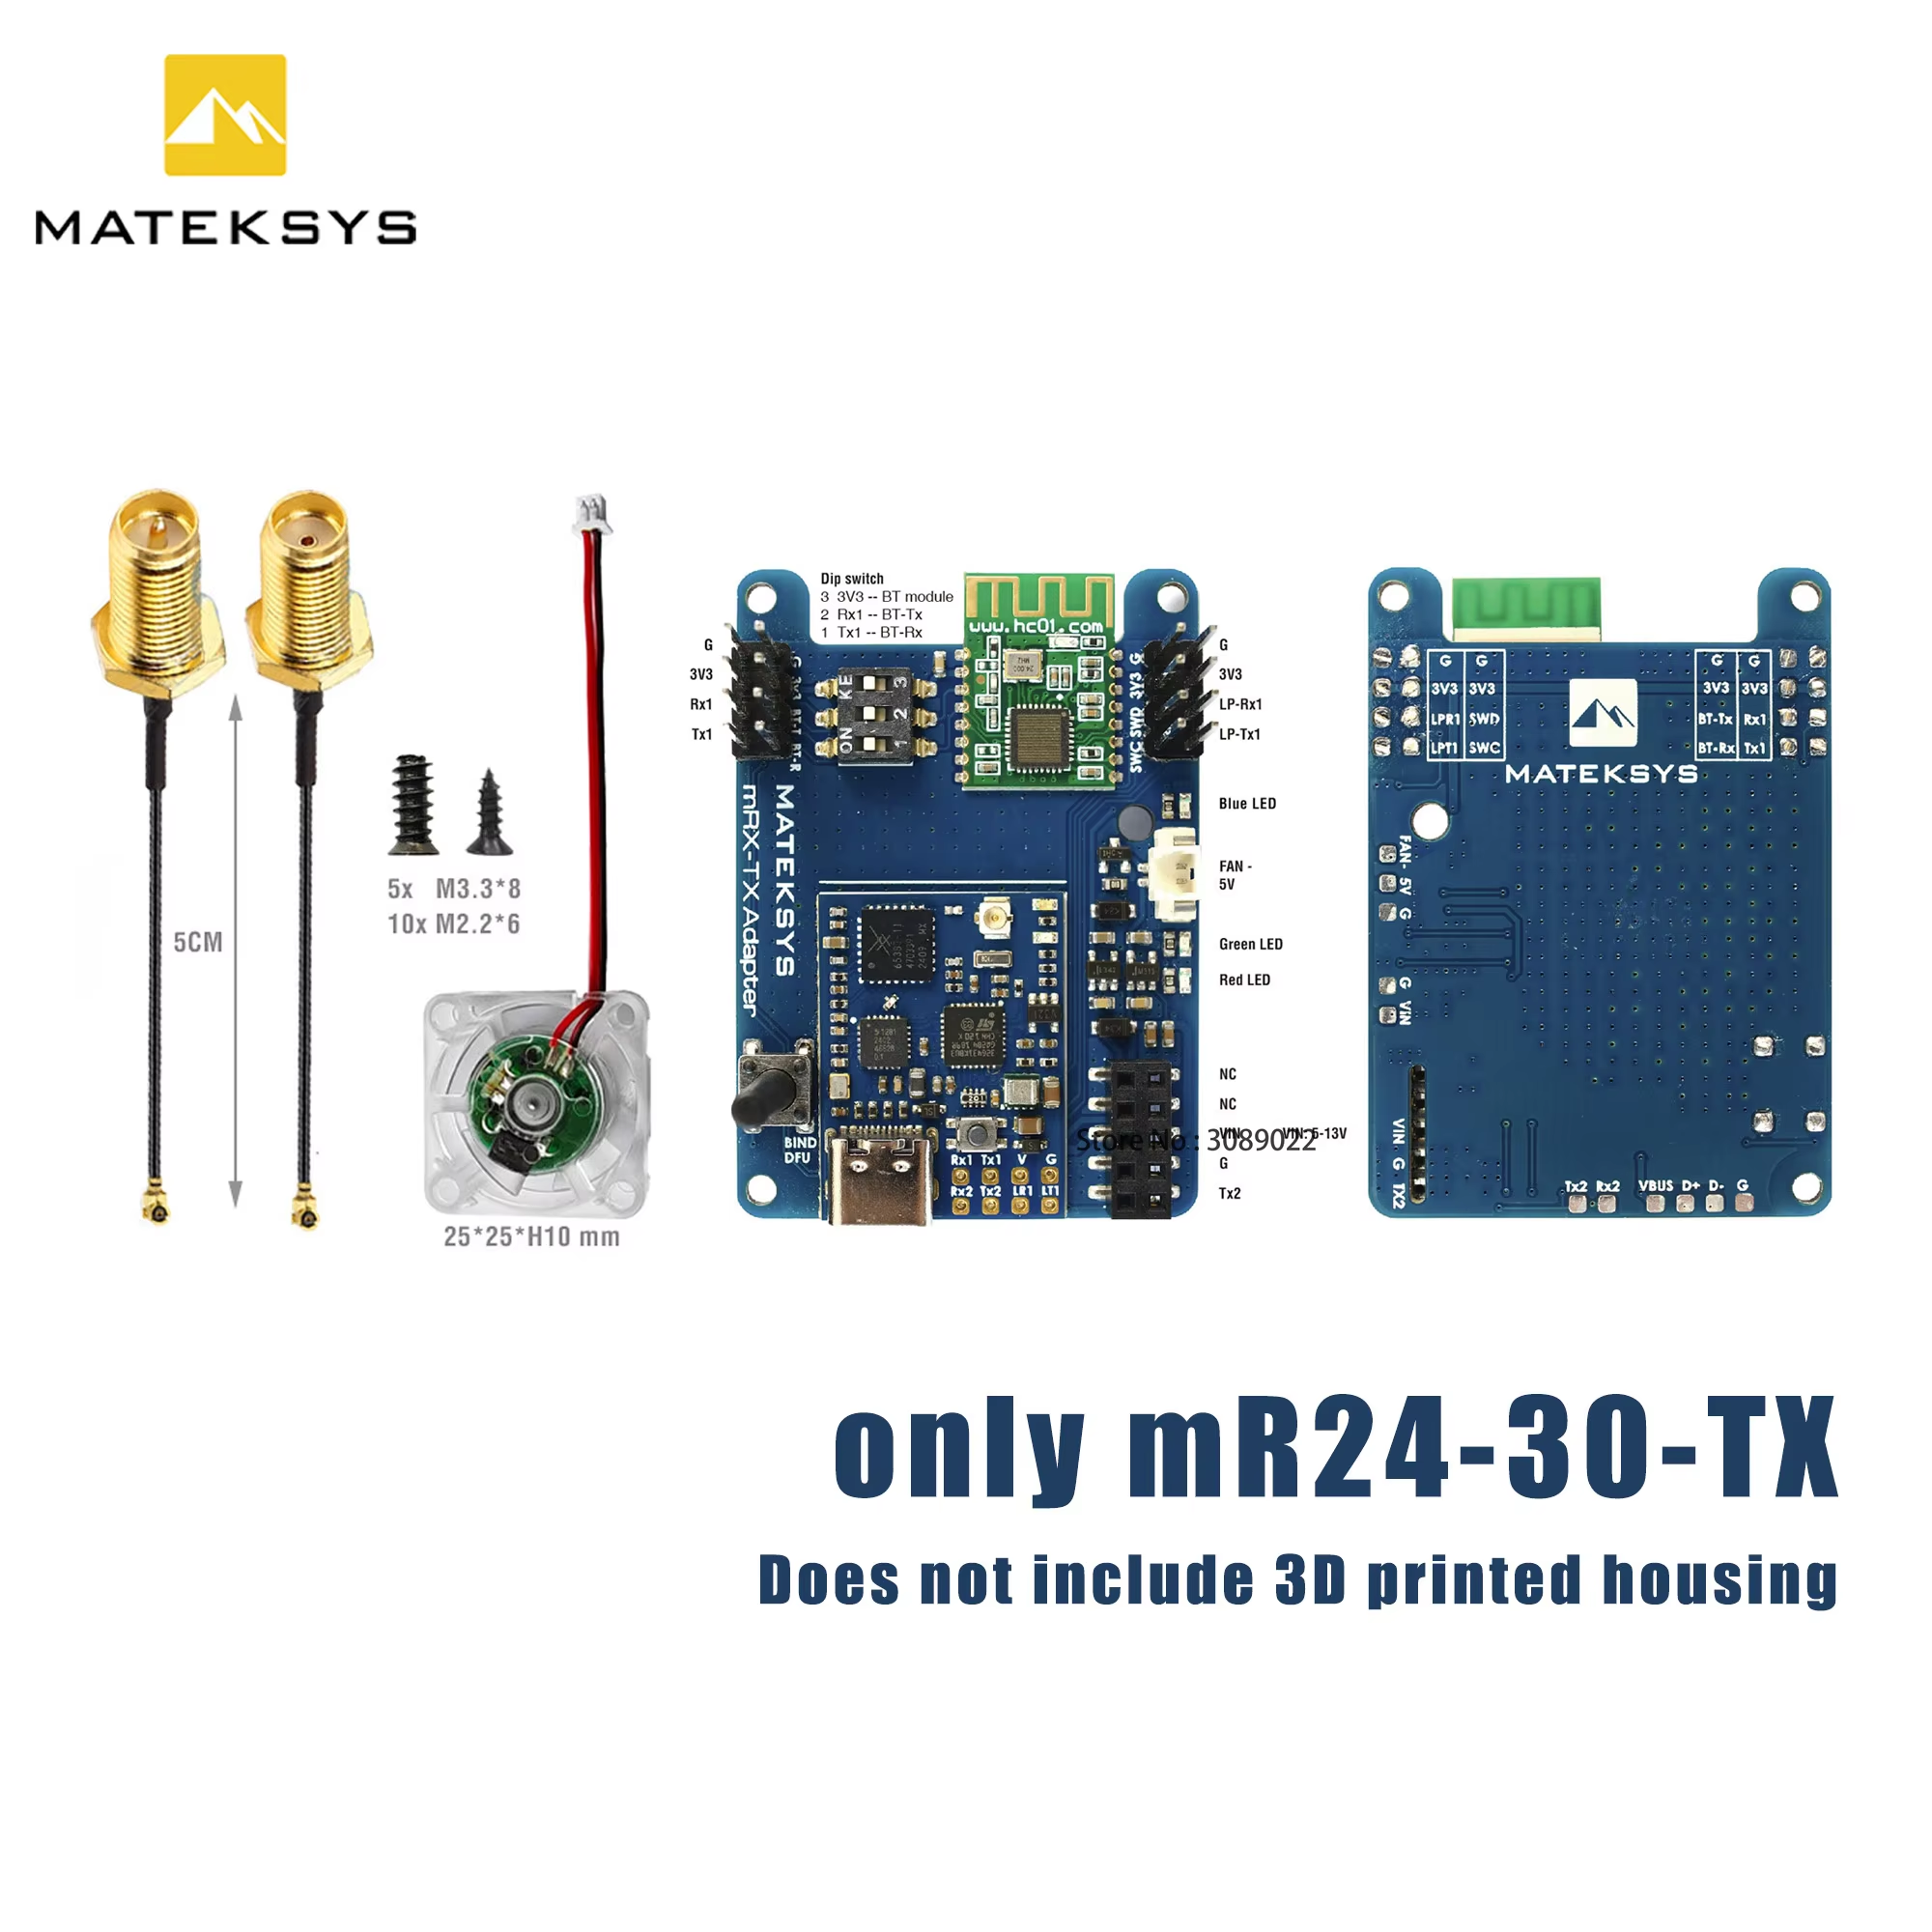
Packing:
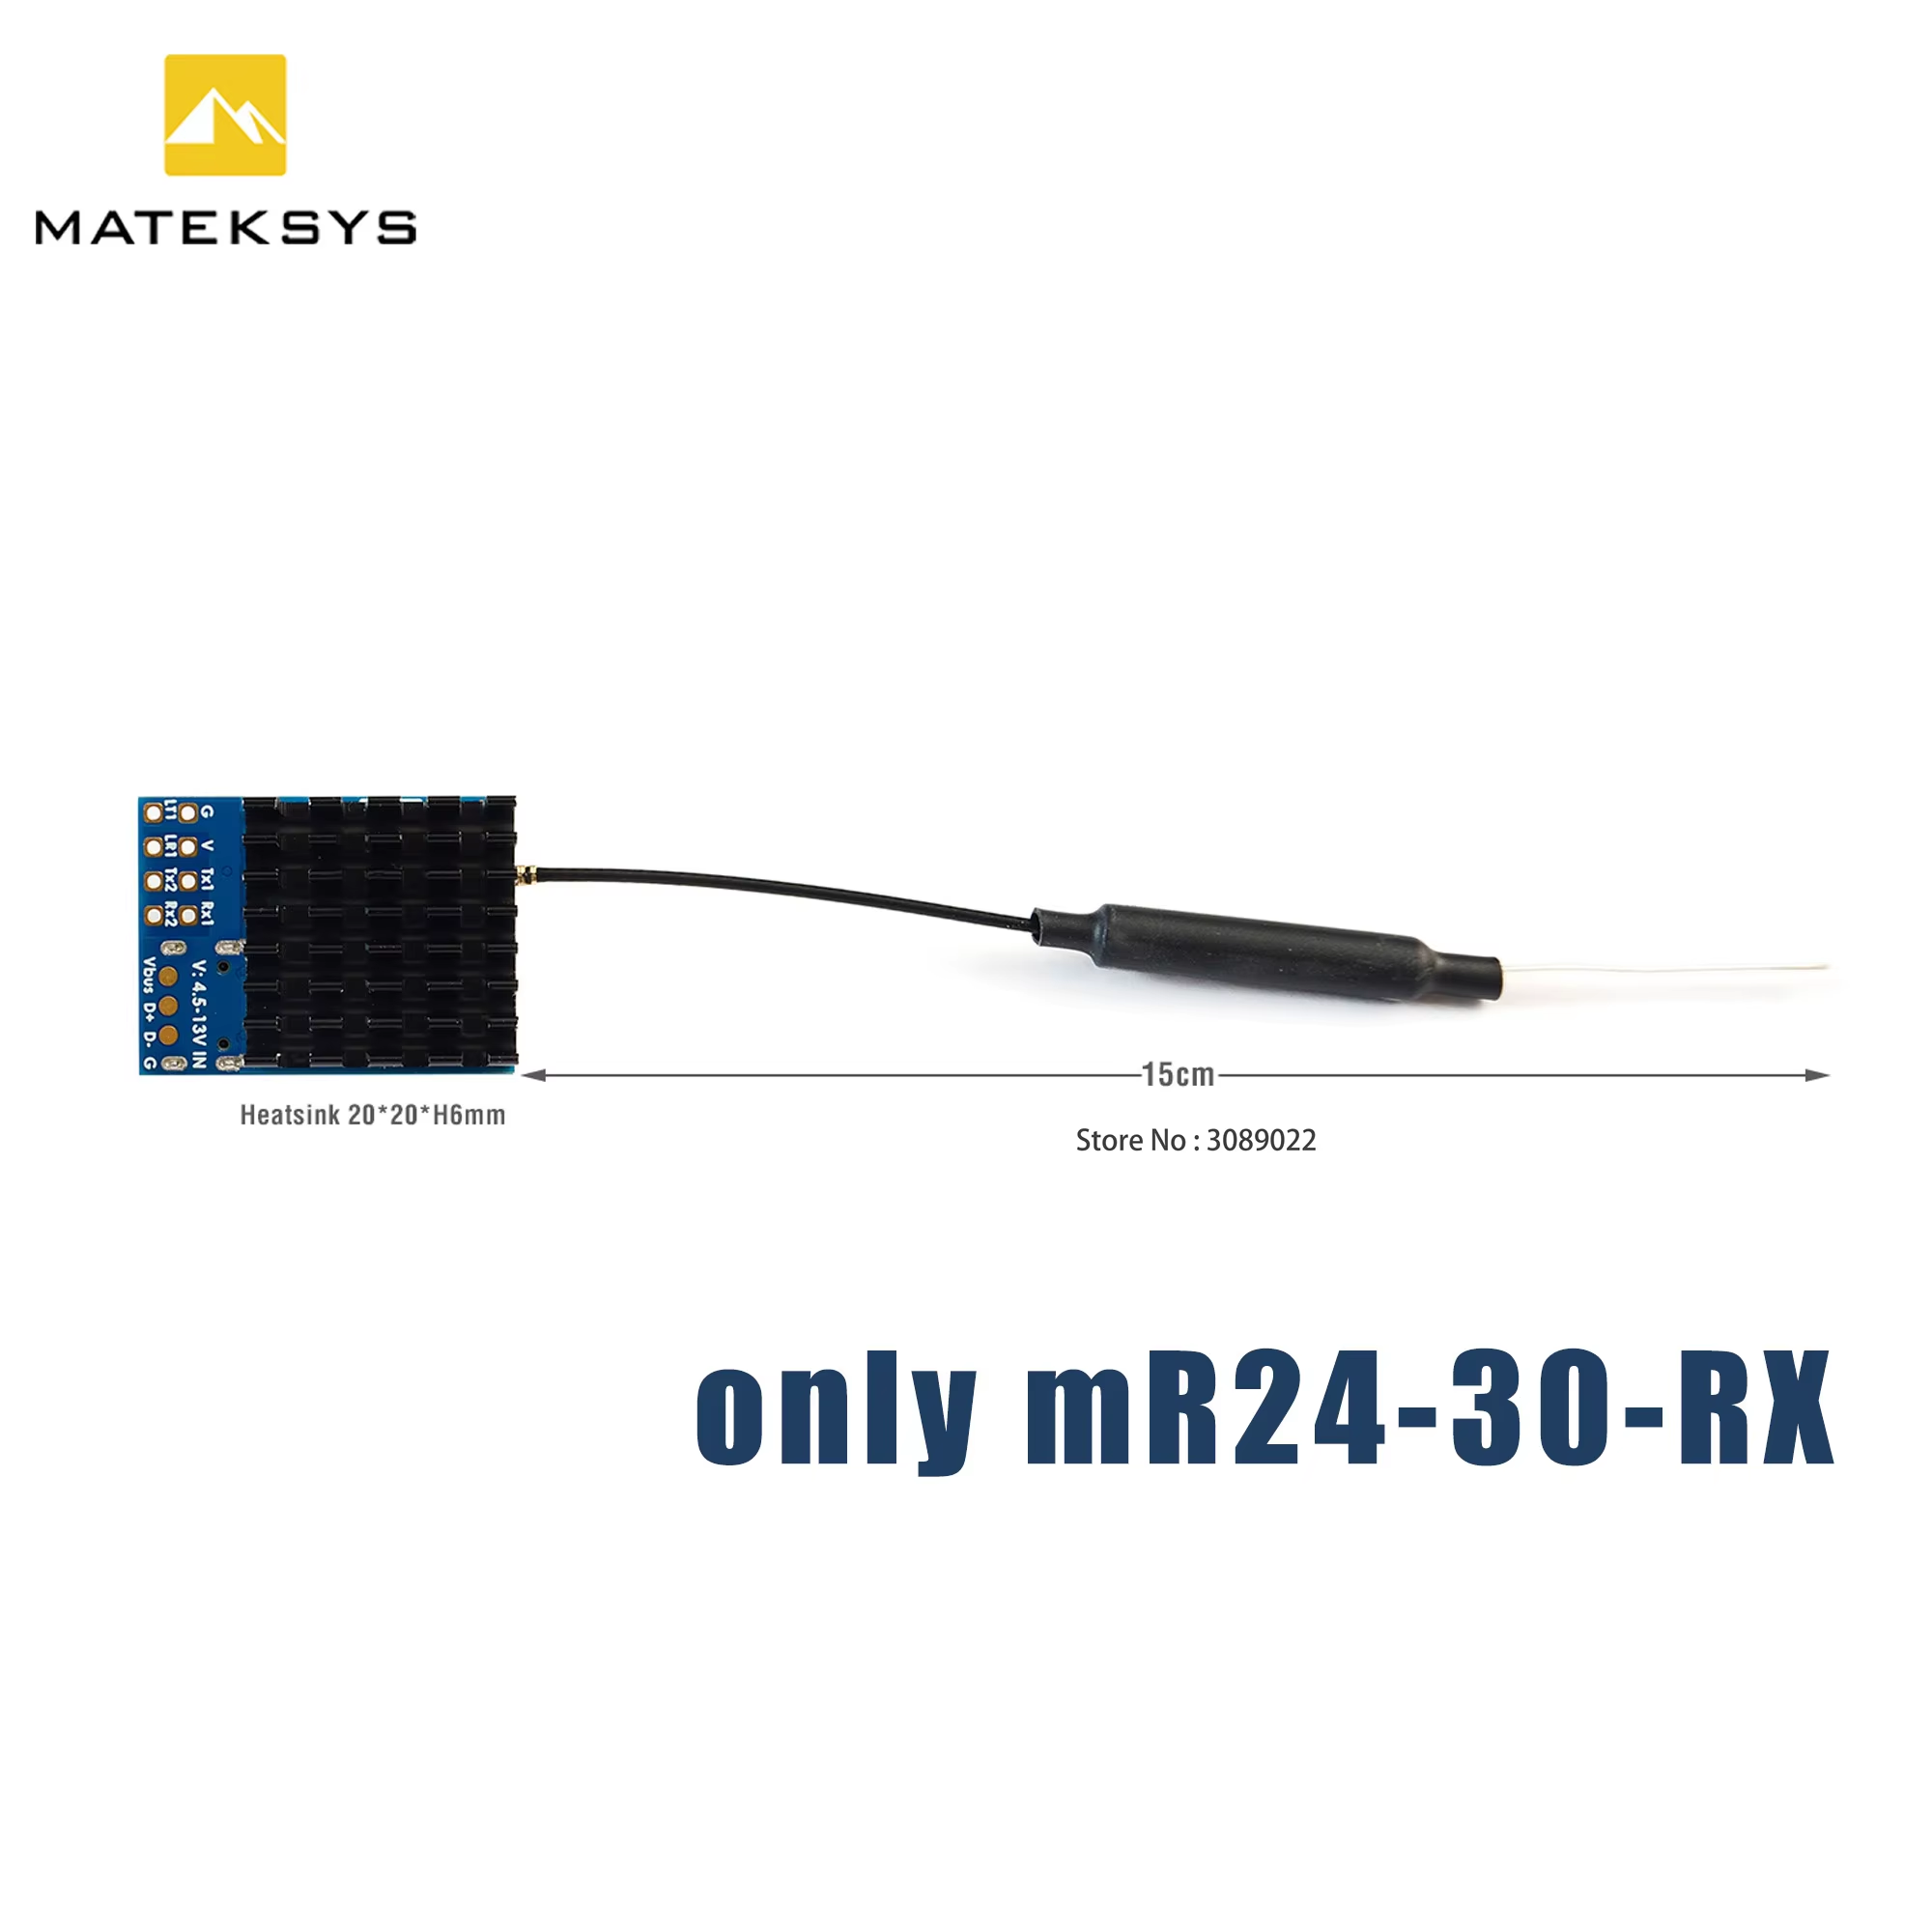
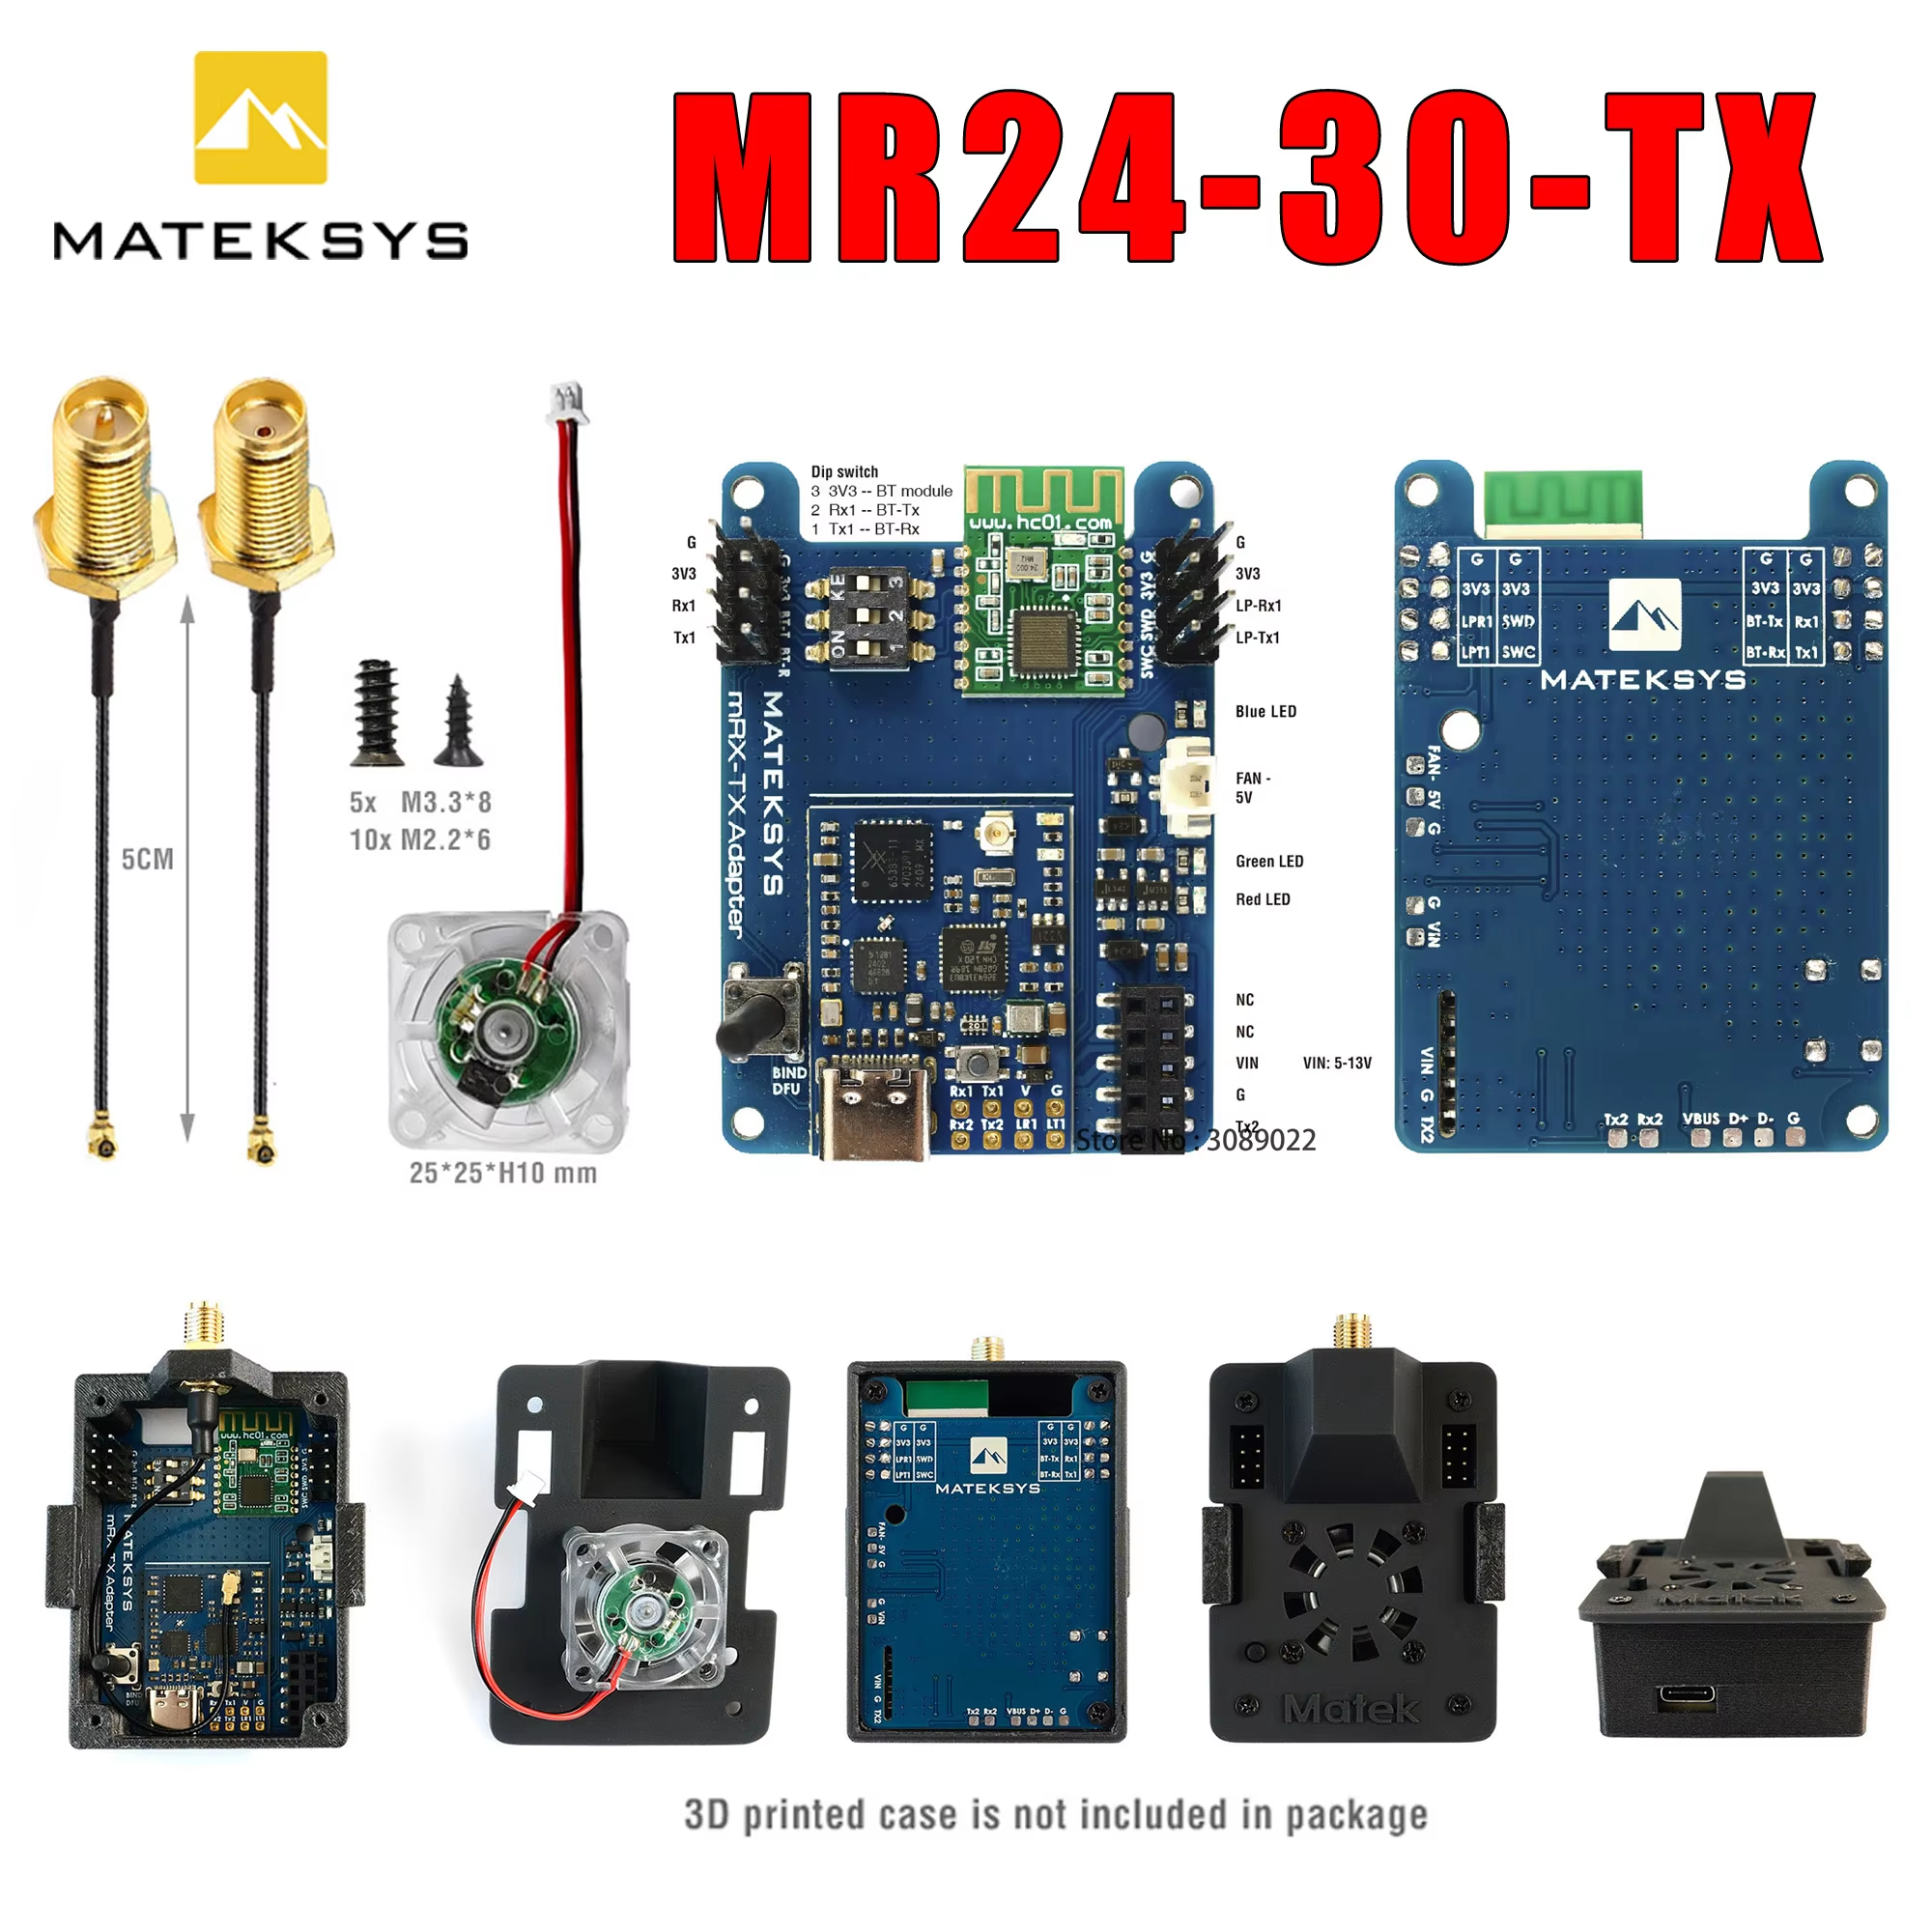
- 1x mR24-30-TX
- 1x IPEX MHF1 to SMA adapter cable 5cm
- 1x IPEX MHF1 to RP-SMA adapter cable 5cm
- 1x 5V Fan (25*25*10mm) and some screws
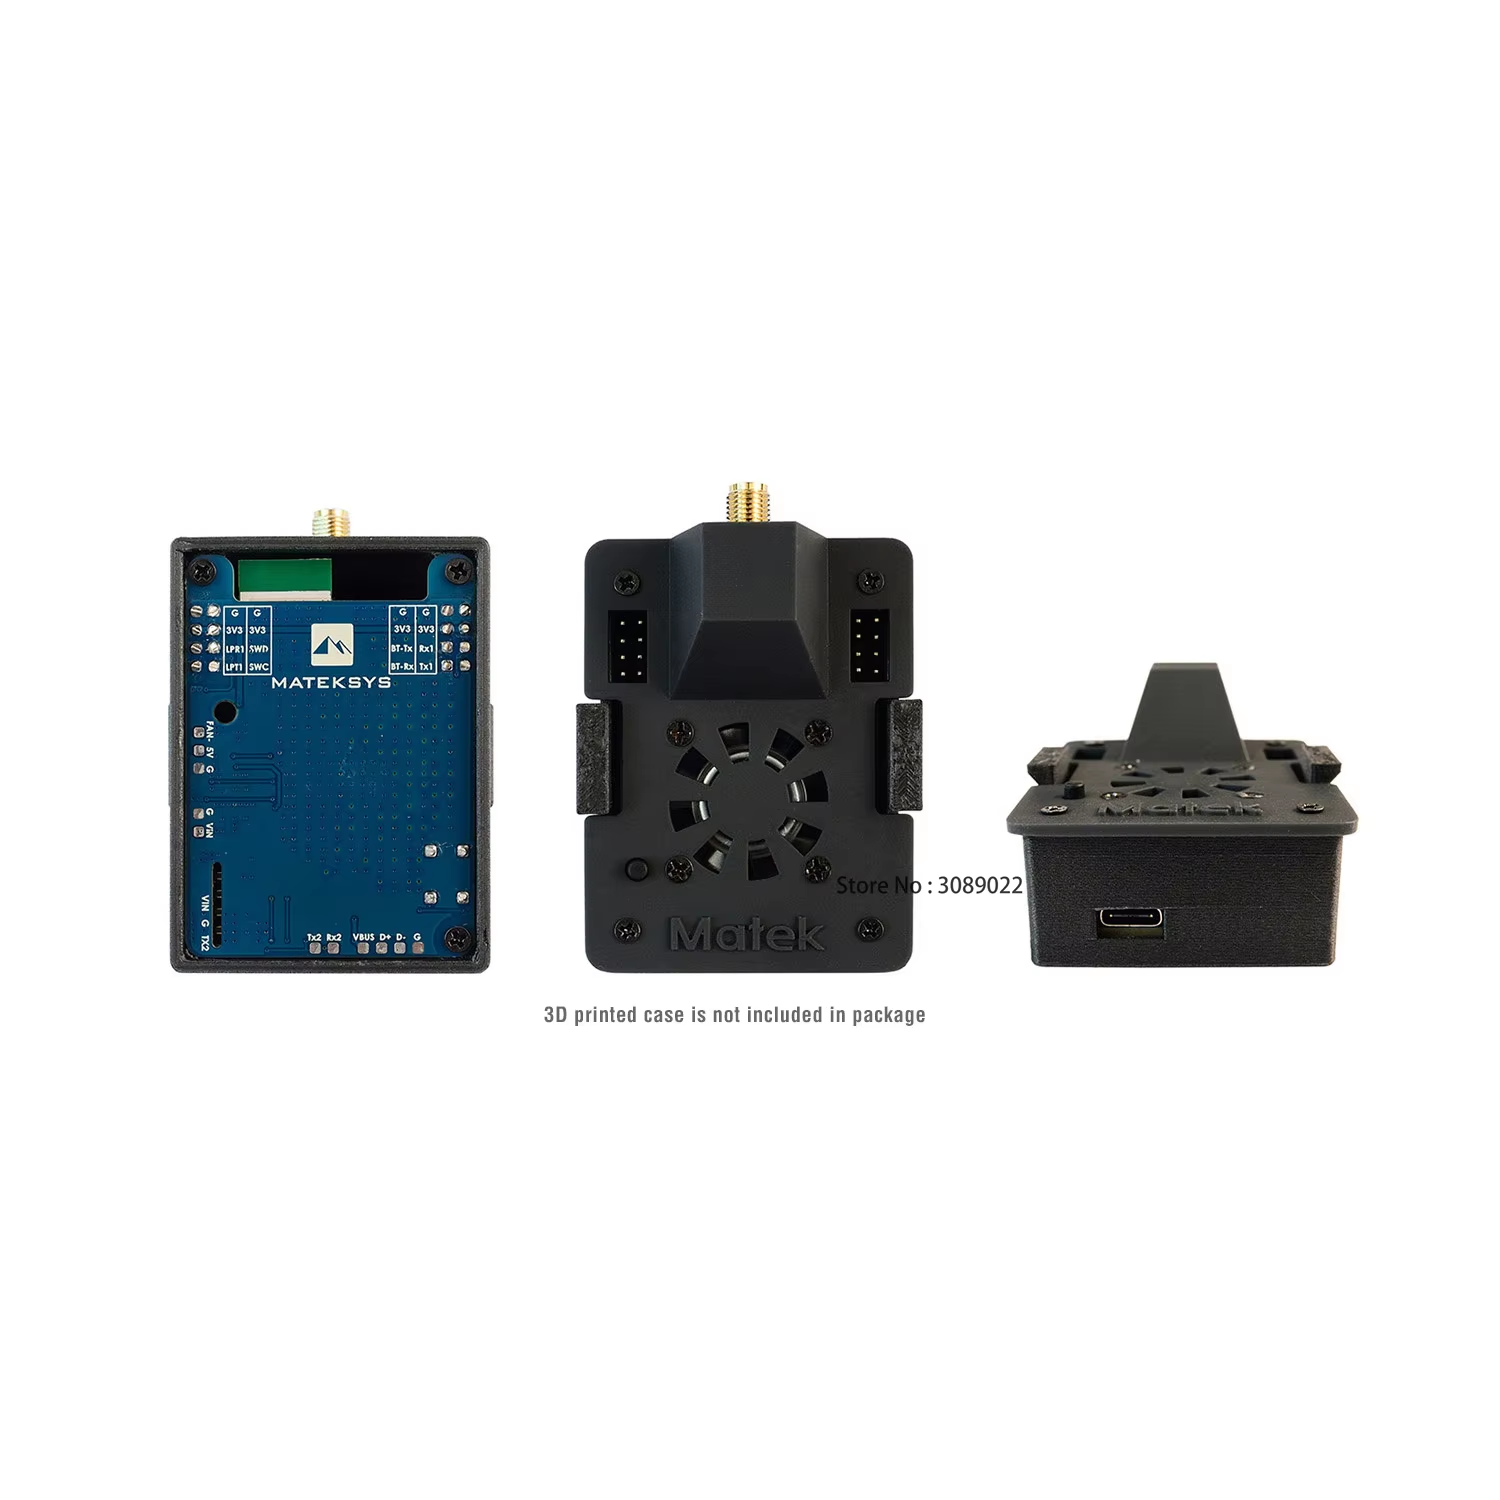
- no SMA antenna & 3D printed Case packed
-
Downloads:
LED Status
- [Red flashing 2Hz], not connected to transmitter
- [Green flashing 1Hz], connected to transmitter
- [Red and Green alternately ], Binding mode enabled
Binding
- After powering on, press the bind button (for ca. 4 seconds) on the receiver. When in bind mode, the green and red LEDs will blink alternatively with ca 2.5 Hz.
- https://github.com/olliw42/mLRS-docu/blob/master/docs/BINDING.md
Firmware
- mLRShttps://github.com/olliw42/mLRS/tree/main/firmware/pre-release-stm32
- Target: tx-matek-mr24-30-g431kb-default
Tips
Routing and layout

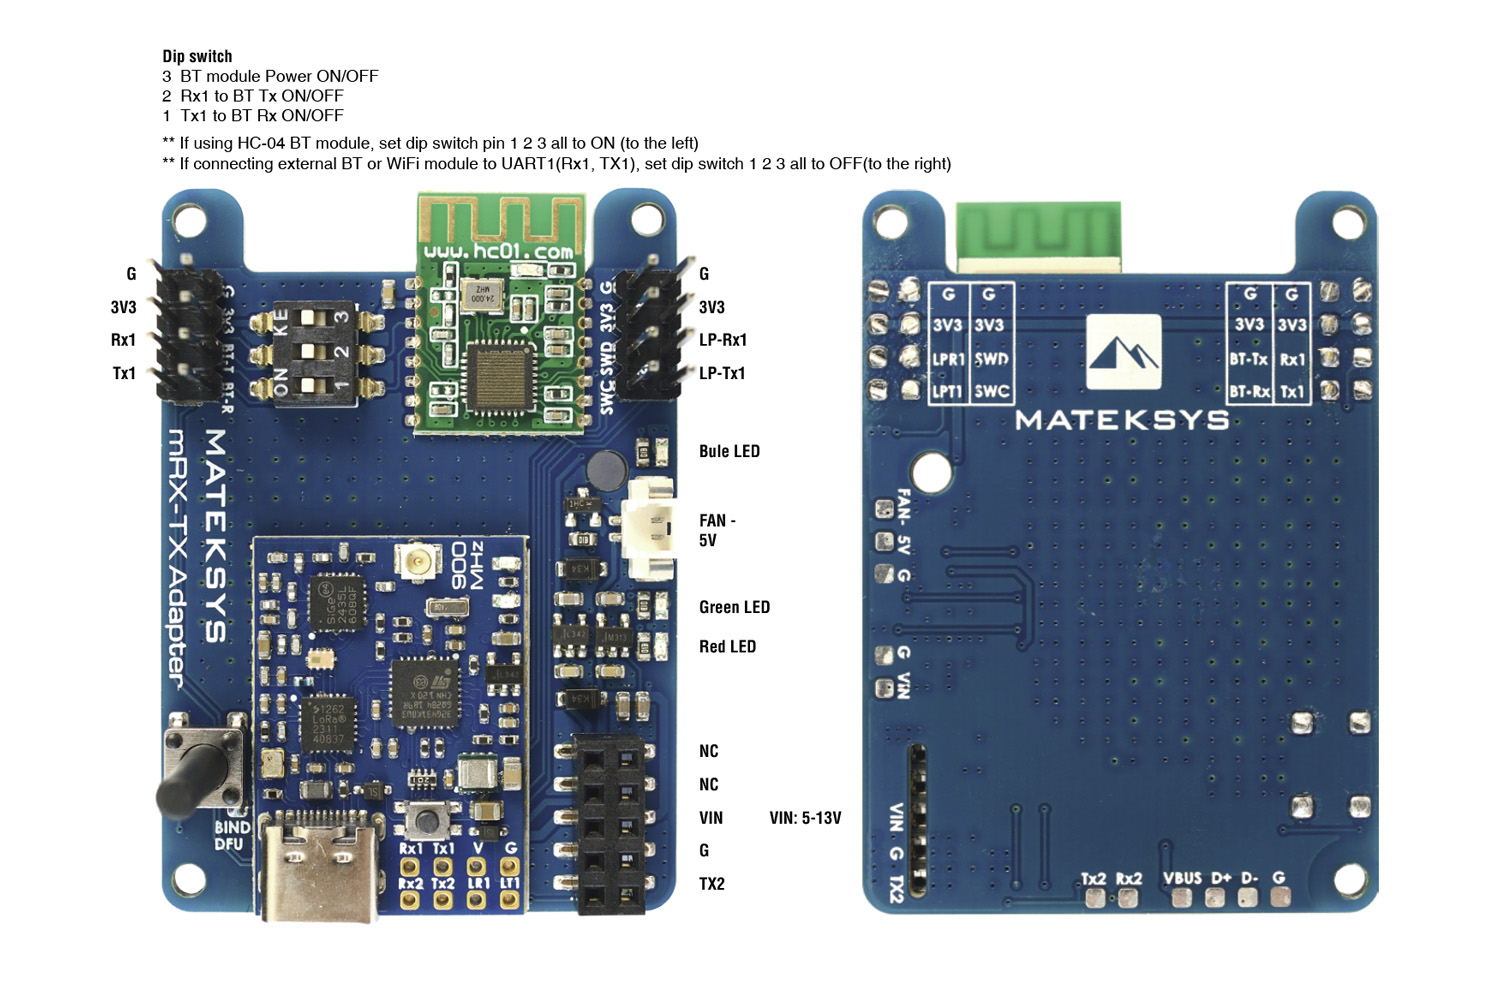
Dip switch
- Dip switch 1/2/3 all ON, enable HC-04 communication with UART1 of STM32G431
- Dip switch 3 ON, 1 & 2 OFF, connect USB-TTL to G/3v3/BT-T/BT-R to configure HC04 via AT command
- Dip switch 1/2/3 all OFF, you can connect other Bluetooth or WiFi module to G/3v3/Rx1/Tx1
Firmware flashing
Download STM32CubeProgrammer from ST website
mLRS firmware:
- https://github.com/olliw42/mLRS/tree/main/firmware/pre-release-stm32
- Targets: tx-matek-mr24-30-g431kb-default
————————————————————————————————————
Make sure STM DFU driver has been installed. Check out “Install DFU Drivers” inthis page
Connect the TX module USB to computer while holding the boot button in.
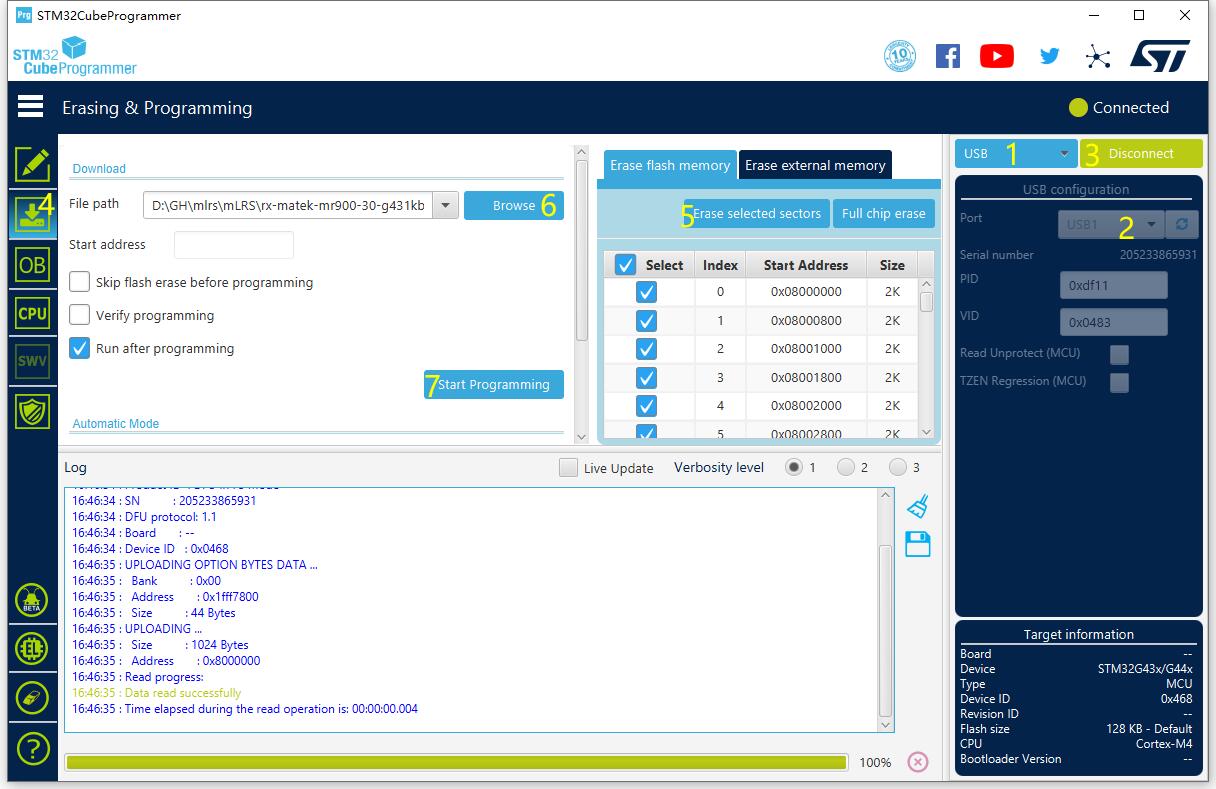
- Select USB
- USB1 and click Refresh
- Connect
- select “Erasing & Programming”
- Tick all sectors and click “erase selected sectors”
- Browse firmware (hex or bin file) related to the hardware.
- Click “Start Programming”
- After programming, unplug USB and plug USB back in. If red LED blinks at 2Hz, the TX module is waiting for connecting with receiver.
lua
https://github.com/olliw42/mLRS/tree/main/lua
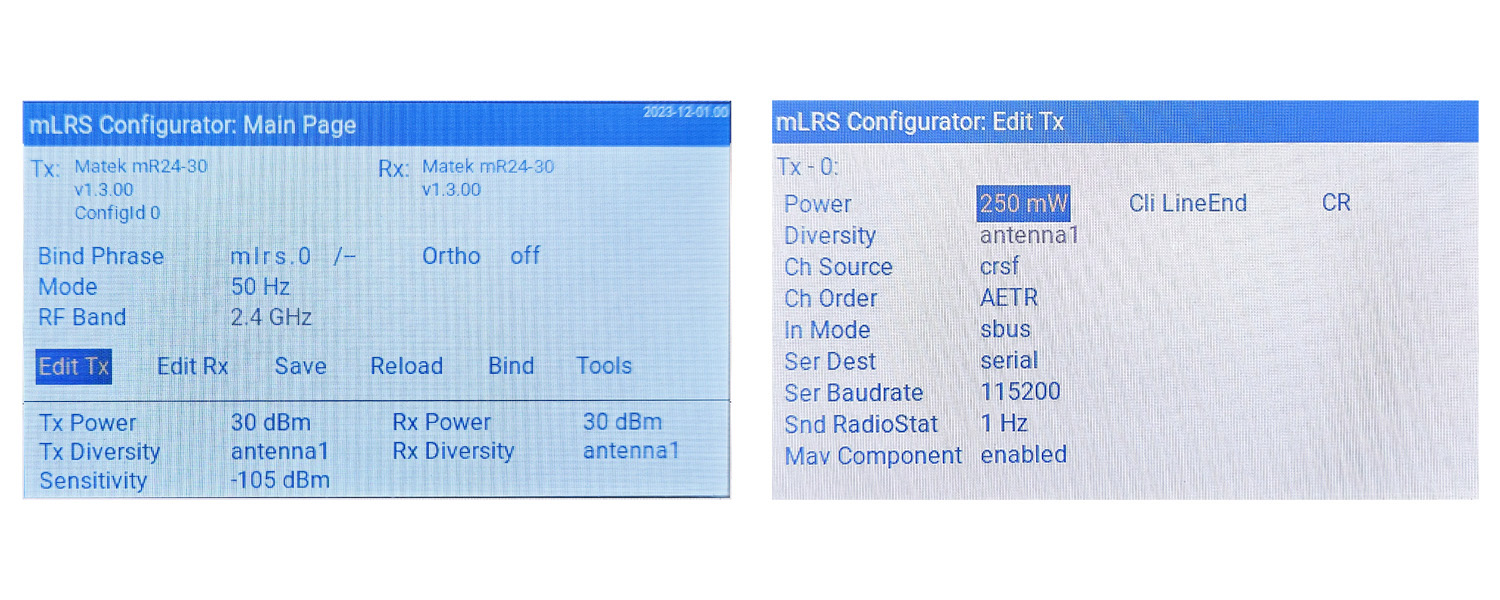
The mLRS Lua script provides the most convenient way to change the Tx and Rx module’s settings.
The Lua script works on both OpenTx and EdgeTx radios but there are two different versions depending on the display of your radio:
- If your radio has a 480×272 color screen (e.g. Jumper T16, Radiomaster TX16S) then use the “mLRS.lua” file
- If your radio has a black and white screen (e.g. Frsky Taranis X9E, Radiomaster Zorro) then use the “mLRS-bw.lua” file
Note: The mLRS script requires EdgeTx version 2.9.x or later.
Setup
Three things need to be done in order to use the Lua script:
- The Tx module must be configured for CRSF or mBridge mode, by setting the parameter “Tx Ch Source” to “crsf” or “mbridge” respectively. Since firmware version v0.2.13 “crsf” is the default setting, so this will be already completed after an initial flash. If not, the CLI needs to be used to set this parameter accordingly, as described in CLI Commands.
- In EdgeTX/OpenTX, navigate to MDL->MODEL SETUP and configure the external RF module for CRSF or mBridge protocol with 400K baud rate.
- Note: mLRS only officially supports 400K baud rate.
- The Lua script “mLRS.lua” or “mLRS-bw.lua” located in the “lua” folder of the repository needs to be copied to the “SCRIPTS/TOOLS” folder of the radio’s SD card. One can follow the common tutorials for how to do this.
You should then be able to run the Lua script by going to SYS->TOOLS on the radio, and selecting “mLRS Configurator”.
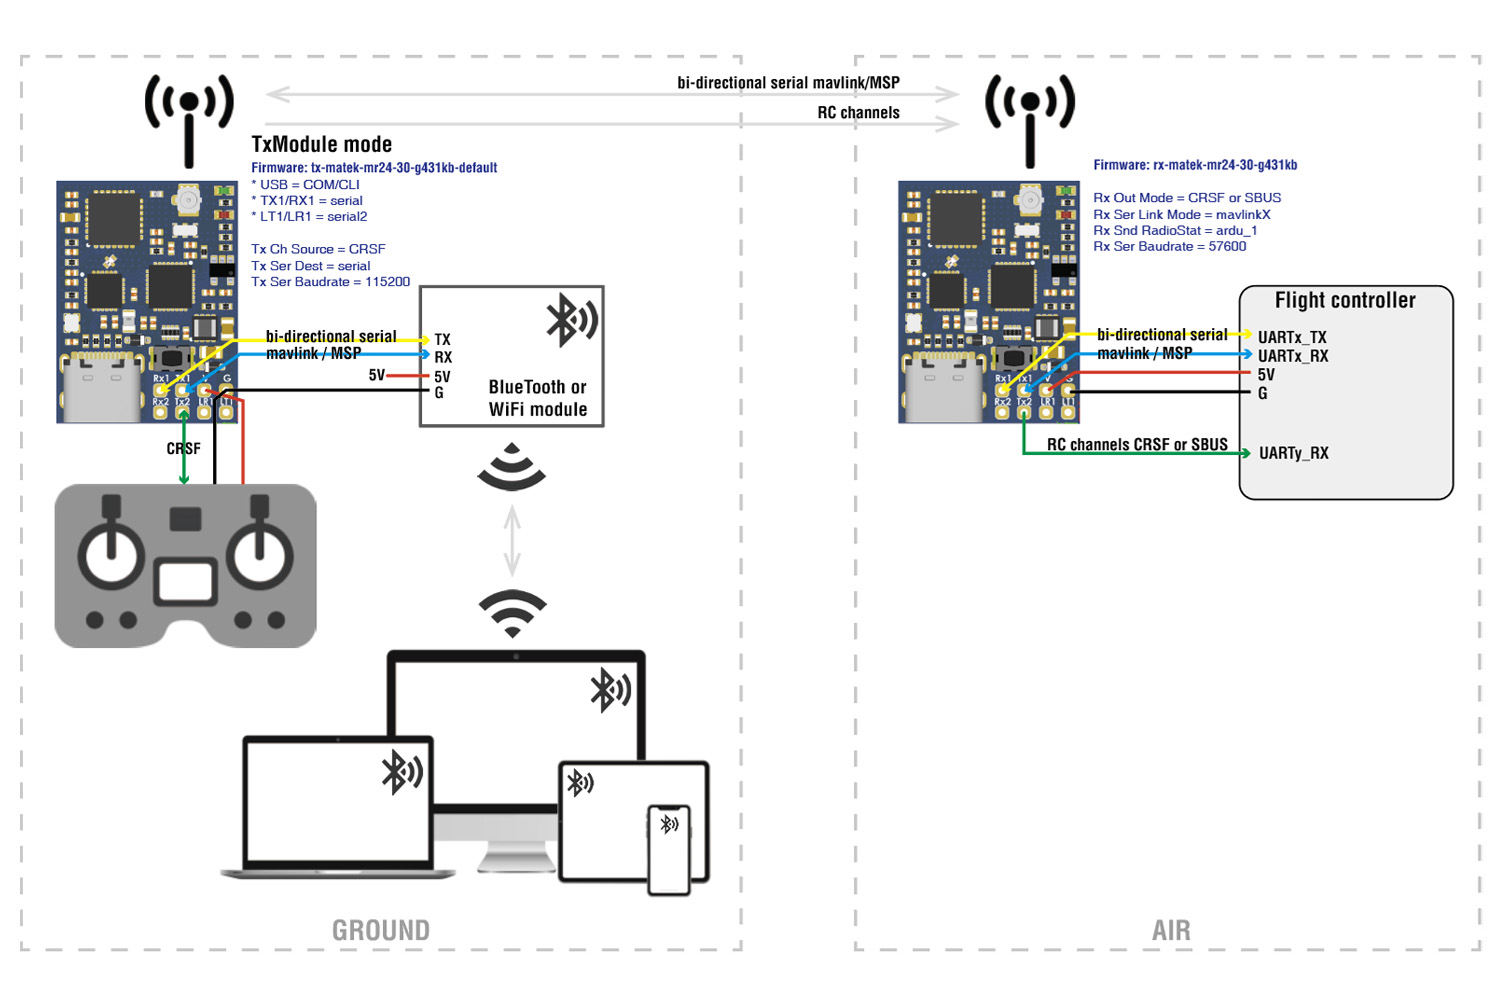
Use mR24-30 as a TX module : tx-matek-mr24-30-g431kb-default-xxx
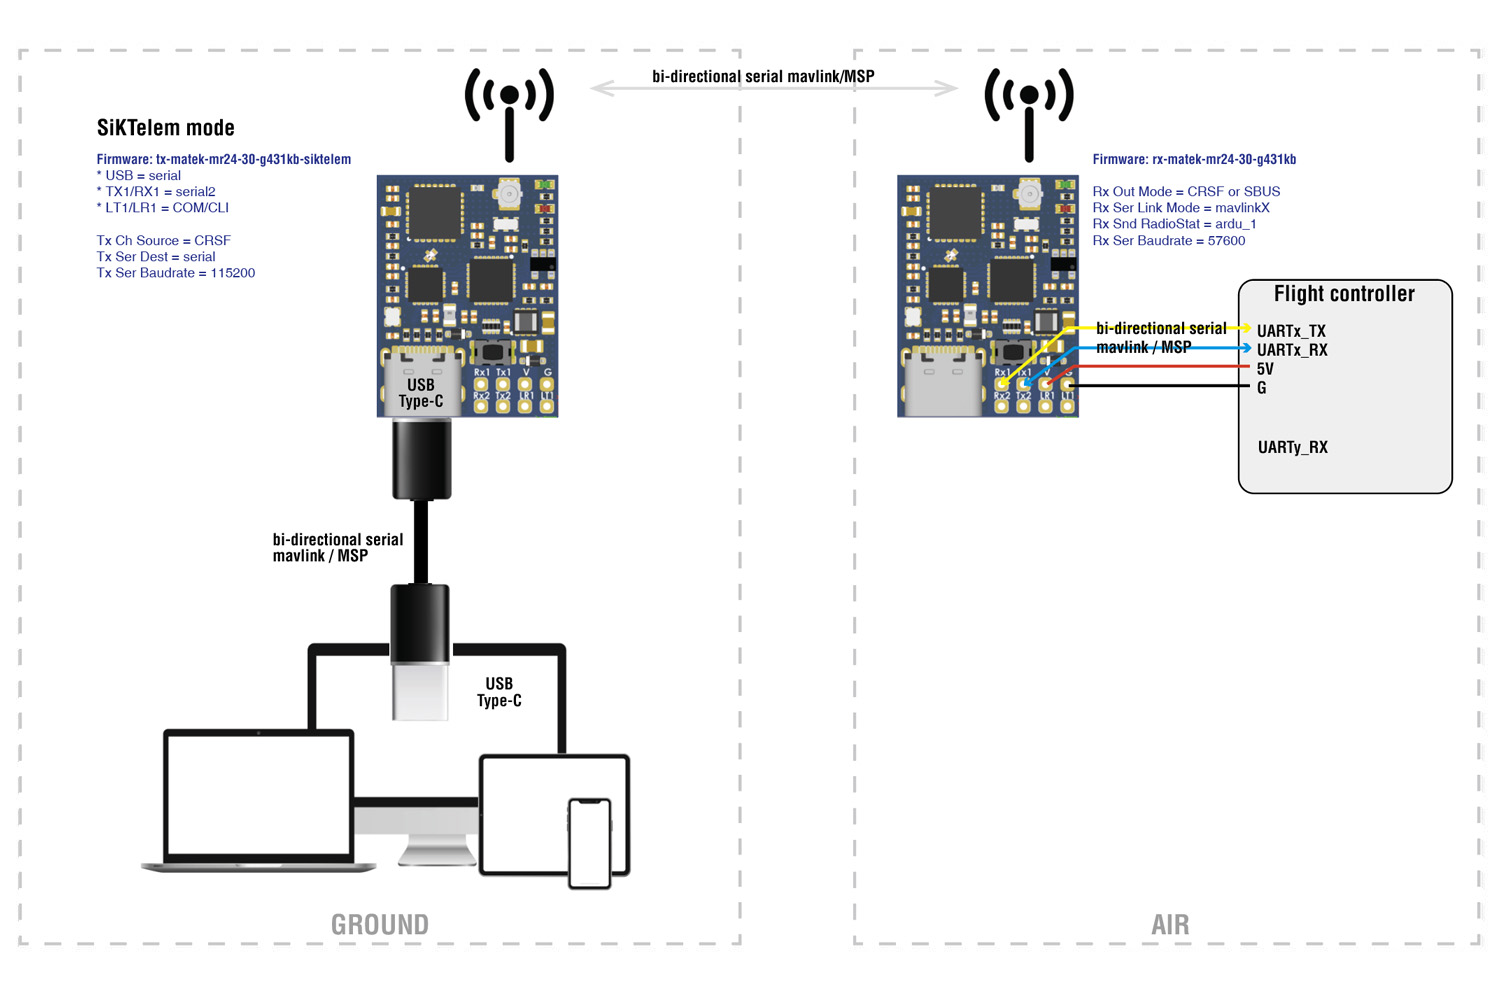
Use mR24-30 as a TX in SiKTelem mode : tx-matek-mr24-30-g431kb-siktelem-xxx
| Weight | N/A |
|---|---|
| Type | MR24-30-RX, MR24-30-TX RX, MR24-30-TX |










There are no reviews yet.